New Customer?
Create your accountNo products
Prices are tax included
Install picorePlayer 8.2 on a rasptouch
How to use Picoreplayer on RaspTouch
This walkthrough will guide you through the installation and use of the excellent software Picoreplayer on the Rasptouch family. It supports power management and hardware volume control through software.
Downloading files and softwares for installation
Start by downloading the last version of Picoreplayer here : Picoreplayer download page (this tutorial has been made with version 5.0 and last verified on 8.2)
This image est compressed with (zip file). If you do not have any tool for uncompressing this image, we suggest you use Winzip / Winrar or 7Zip : 7Zip installer
In order to "flash" (install) the image, we suggest you use Win32Disk imager : download Win32Disk Imager
Once the image has been uncompressed, run WIN32DISK Imager with right-click -> "run as administrator".
In the newly-opened window :
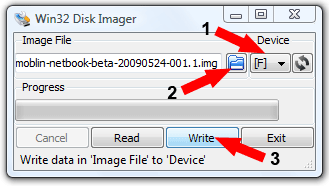
- Select the drive (identified by a letter) which holds the SD card you plan to use
- Select the folder in which Picoreplayer image has been extracted
- Double check that you selected the right image file and the right drive and click the "Write" button.
When the progress bar is full and the software says "write successfull", the SD card is ready.
You can now insert the SD card inside the raspberry Pi, power it and turn it on.
Accessing Picore admin interface
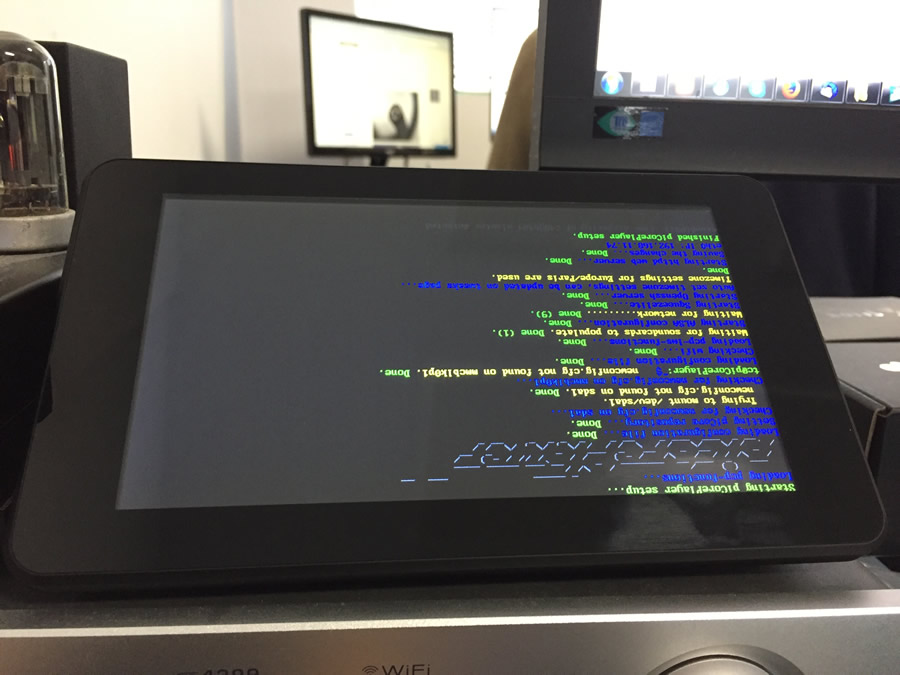
Once your Rapstouch has finished booting (it usually takes a whole minute depending on your Pi version and your SD card speed), you can access it and control it from its control interface.
Picoreplayer homescreen is displayed upside-down. We will see how to rotate it in a minute.
Use any device with a web-browser and use it to connect to the IP address that has been allocated by your box / router with DHCP.
If you have no idea how to get this IP address, you can use this very useful software : AngryIpscanner
Or if you use a smartphone for this step, you can use Ping app as well (android).
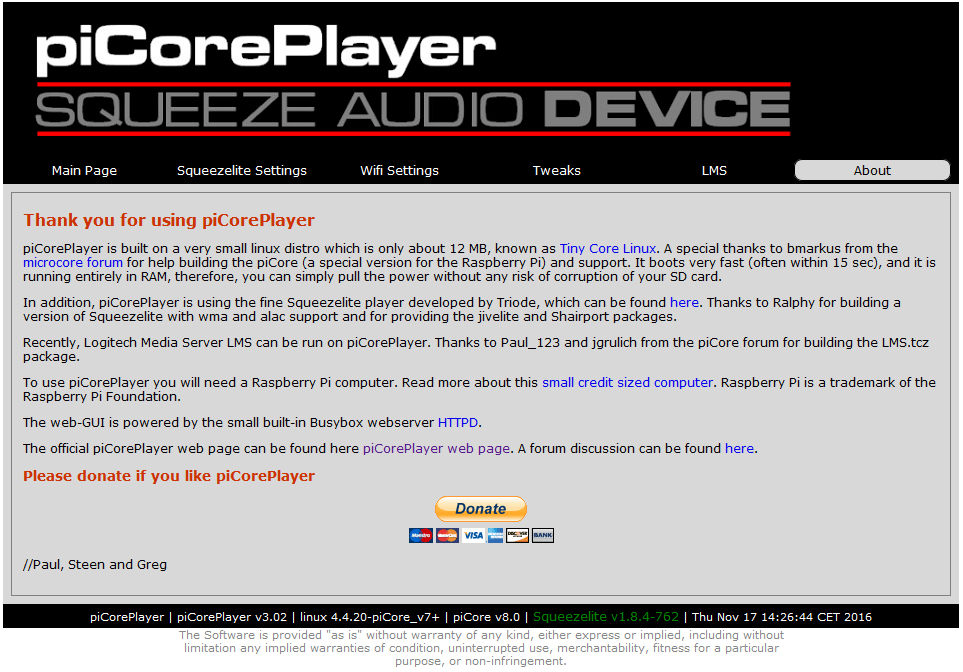
Once you have the IP adress, type it in a web-browser and you will get the following interface :
Setting Picore
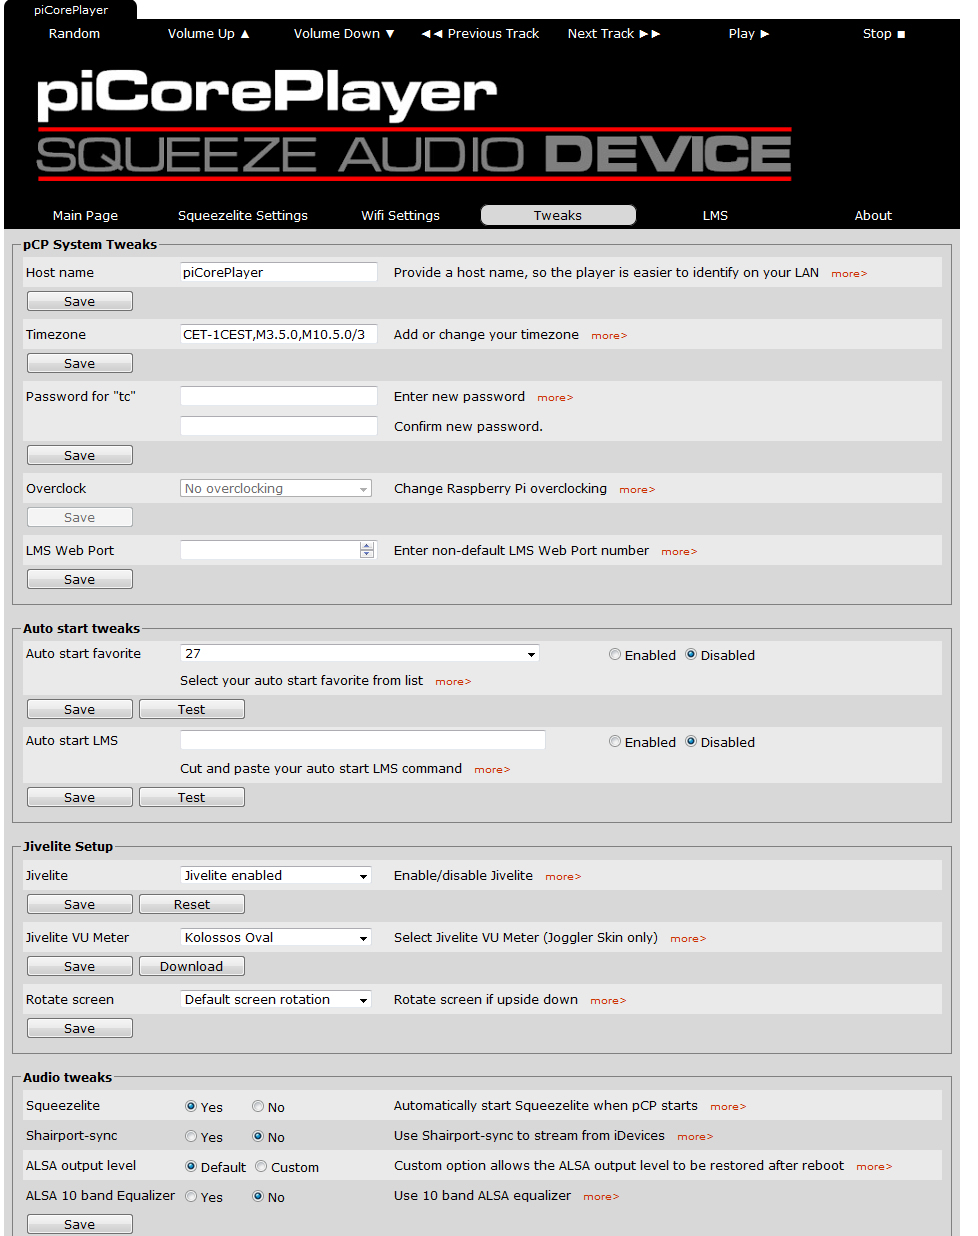
For the next step, you need to get on the very bottom of the page. You will find a tab list : Basic / Normal / Advanced / Beta. Click on "Advanced" to get access to all options. Now get back on the top on the page. You can see another tab list under the piCorePlayer logo. Go to the "Tweaks" tab.
Change the option "Jivelite Setup" from Disabled to Enabled and click on Save.
Picore will now load the files required for the update and ask you to reboot the system "Reboot picoreplayer"= Ok
Your Rasptouch reboots with the Jivelite touch-interface. It should be still upside-down.
Go back to the "Tweaks" tab and change the option "Default screen rotation" to 180° and Save.
"Reboot picoreplayer" = Ok
Sometimes this change is not taken into account at the first try. If it happens to you, just repeat the process from "Tweaks" -> "Default screen rotation".
From now the touch screen boots on the right side.
For the next step you need to tell Picore which DAC is mounted as hardware.
Click on "Squeezelite setting" tab and change "Audio output" from "Analog audio" to "Audiophonics ISabre Q2M"
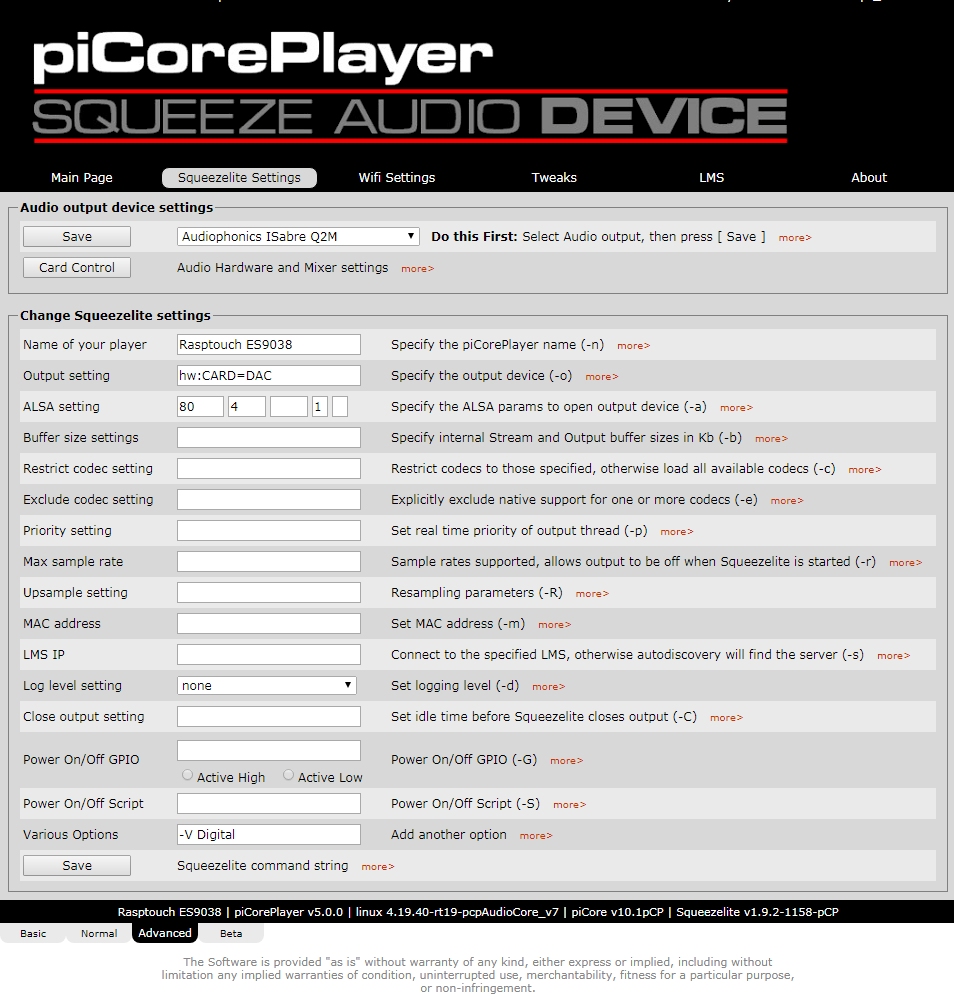
Save and reboot.
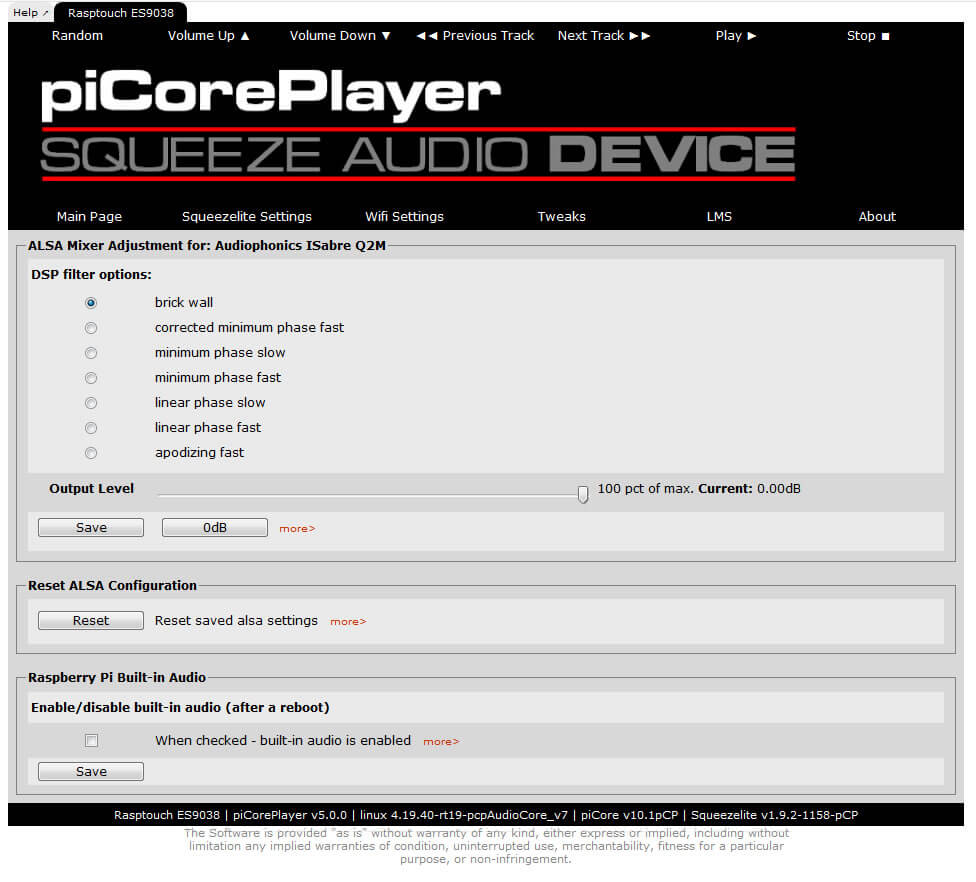
After the reboot, you can now define settings that are specific to the ISabre DAC inside your Rasptouch in the "CARD CONTROL" tab :
Last step : installing the power management script.
Go to the top page's first tab ("Main Page"), click on the last button ("Extensions").
The device needs a few seconds to connect to the web. A field named "Set extension repository" appears in the section "Official picore repository" when its done
Change the setting to "Picoreplayer sourceforge repository" and click on "Set".
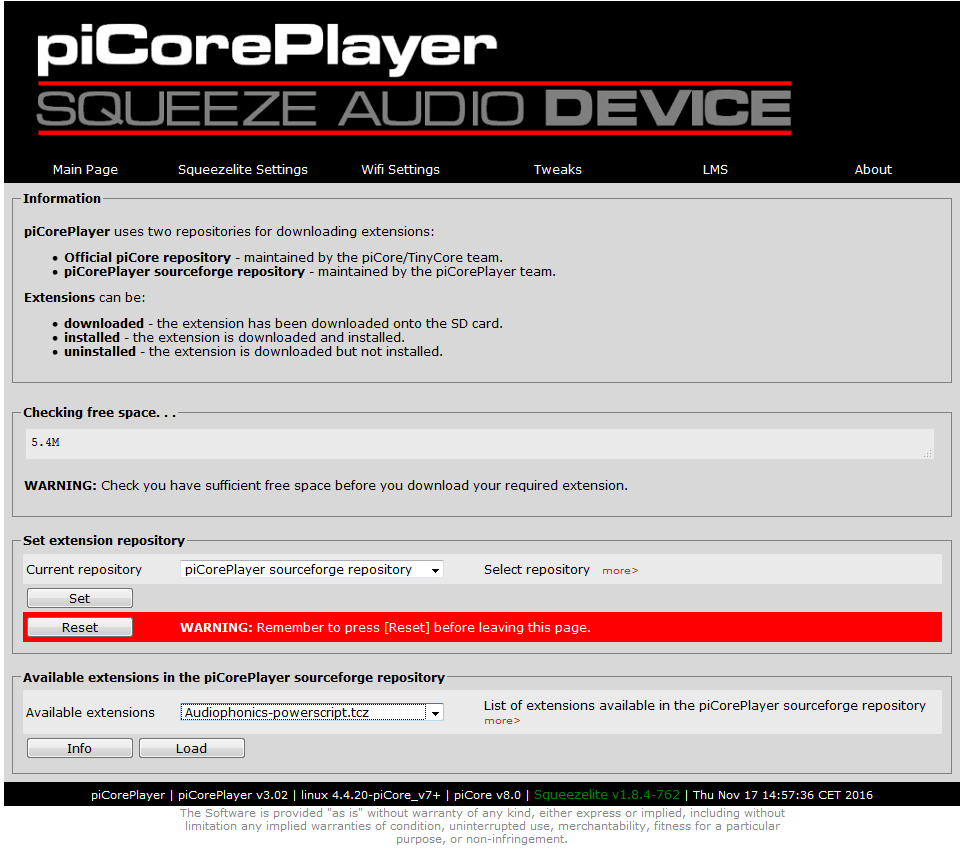
The tab "Available extensions in the piCorePlayer sourceforge repository" switches to "Audiophonics-powerscript.tcz".
Click on "Load".
A short window "installing" appears.
Go back to the "Tweaks" tab and navigate to the bottom of the page. You will find a section named "User commands". Locate the filed "Usaer Command #1", copy/paste the following path :/usr/local/bin/sds.sh and save

At this level, the power button is still blinking
Go back to "Main page" and click "Reboot".
As soon as you see Picore's splash screen, the button will stabilize on ON.
Setting Jivelite touch interface
Click on your langage and validate the value "Joggler Skin".
You are now in Picoreplayer and can start exploring all its fonctionnalities and listen to your music & internet radio.
Installing LMS
If you need more details on how to install LMS, please check this tutorial.
Rechercher dans le blog
Blog categories
Latest Comments

Audiophonics Team
on DIY Tutorial - PiCorePlayer - Installing...
Pierre Bommel
on Lecteur réseau Opensource : Solutions
Pierre Bommel
on DIY Tutorial - PiCorePlayer - Installing...
Audiophonics Team
on Tutorial DIY - Power cable ELECAUDIO CS-331B


![[GRADE B] DAYTON AUDIO MKSX4 Low Profil Subwoofer Speaker 160W Ø20cm](https://www.audiophonics.fr/72897-thumb_default/dayton-audio-mksx4-low-profil-subwoofer-speaker-160w-o20cm.jpg)


13 Commentaires
Laisser un commentairechristian cheignon 2024-04-03
J'ai installé la version 9, il y a quelques jours. Tout est fonctionnel dans le tuto. Vous pouvez même enlever la partie correspondant à l'affichage à l'envers, car la nouvelle version démarre dans le bon sens.
La gestion de l'alimentation, telle que décrite dans le tuto fonctionne parfaitement également.
Christian
Audiophonics Team 2024-04-04
christian cheignon 2024-03-20
Je viens d'installer picoplayer sur mon rasptouch. Tout est fonctionnel.
Par contre, j'aurai souhaité savoir si vous aviez un tuto pour instaler Material Skin sur Jivelite. Je l'ai installé sur LMS, c'est fonctionnel et agréable.
J'ai vu que vous le mettiez en œuvre sur AUDIOPHONICS EVO-TOUCH.
Merci d'avance
Christian
Audiophonics Team 2024-03-21
Le Evo-Touch utilise un Firefox LTS réglé pour utiliser de l'acceleration matérielle (Wayland) mais :
- cela ne fonctionne que parce que la version du Pi est connue à l'avance
- la configuration est incroyablement laborieuse
C'est effectivement une idée intéressante de tester ce type de technologie plus moderne sur un RaspTouch, mais ce ne sera surement pas dans avenir immédiat..
christian cheignon 2024-03-21
Merci pour le retour
christian cheignon 2024-05-02
Je viens d'installer l'interface Material Skin sur mon rasptouch.
https://kdrive.infomaniak.com/app/share/127050/f10b95e1-f2a5-4ac6-8d62-daef79bacb0d
Tout est fonctionnel et plutôt rapide que ce soit au niveau du démarrage que de la réctivité de l'affichage.
Audiophonics Team 2024-05-02
christian cheignon 2024-05-02
Pour toute cette installation j'ai utilisé ce tuto
https://forums.slimdevices.com/forum/user-forums/linux-unix/1672603-pcp9-and-material-skin
Rémy de Fenoyl 2023-12-10
Je suis tenté d'acheter un Rasptouch mais je n'ai aucune envie d'y passer 10h d'installation en cherchant des drivers et des solutions de contournement sur les forums.
Visiblement ce tuto est presque à jour, l'équipe peux elle confirmer qu'il est 100% fonctionnel ? Le mettre à jour une fois par an en vérifiant l'installation avec la dernière version des différents éléments logiciels permettrait de rassurer vos clients et gagner en visibilité.
Un futur client qui vous remercie !
Audiophonics Team 2024-01-29
ce tutoriel est testé, à jour et fonctionnel (janvier 2024)
Marc Sélince 2022-11-15
J'ai upgradé mon rasptouch Digi One de la v5.0 à v8.2.0 64bits en suivant ce tuto. Tout est nickel d'un point de vue musical, par contre j'ai des soucis avec la gestion d'alimentation pour le shutdown (ai suivi le tuto spécifique à la carte Allo DigiOne)
L'extension "Audiophonics-powerscript.tcz" n'est plus disponible sur le repository.
Je n'arrive pas à faire fonctionner le bouton power qui reste clignotant (le bouton tactile on/off ne fonctionne pas non plus).
Quelqu'un a-t'il une solution à me proposer ?
PS: Toujours aussi satisfait de mon Rasptouch couplé à mon système Linn en config active.
Audiophonics Team 2022-11-22
En attendant que je trouve le temps de le mettre à jour, je vous conseille d'aller tout en bas de l'onglet "TWEAKS", dans la section "USER COMMANDS" et d'y entrer la ligne de code suivante sans les guillemets :
"sh /home/tc/pcp-powerbutton.sh -i 27 --high -o 22"
Cela devrait activer les fonctions de bases du gestionnaire d'alimentation.
(Pour les autres lecteurs, n'utilisez pas cette ligne de code telle quelle si vous n'avez pas EXACTEMENT un Allo DigiOne : les pins doivent correspondre)
Marc Sélince 2022-11-26
J'en profite, je n'ai jamais réussi à faire fonctionner le "vu mètre" lorsque le Rasptouch est connecté en wifi (fonctionne avec ethernet) - est-ce que c'est mon jour de chance et vous avez aussi une solution pour ça ?