New Customer?
Create your accountNo products
Prices are tax included
Configure DietPi with the Allo USBridge
Configure DietPi with the Allo USBridge
This tutorial simply explains the process to follow to configure DietPi with the USBdrige Allo, in order to access files stored on a local networked NAS or USB storage device.
Summary :
1. Connection diagram
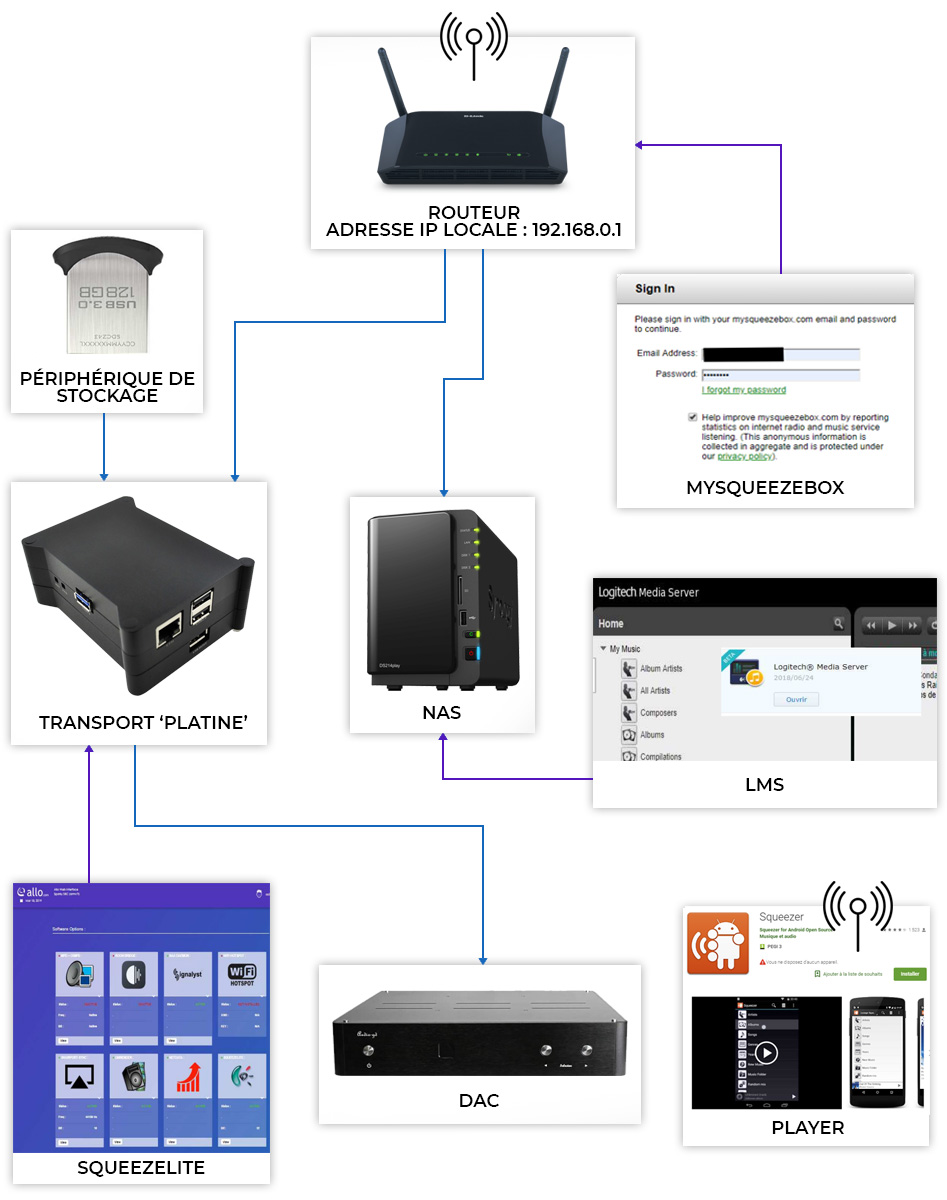
The diagram below explains how to connect each of your devices to integrate them into a single network and simply enjoy all your audio files from the LMS interface.
The following steps are to be followed:
Router :
- Indentify IP adress of your USBridge and NAS
DietPi - SSH Protocol :
- Step 1 : Activate SqueezeLite AND SqueezeBox
- Step 2 : Associate your USB storage device
- Step 3 : Associate your NAS
Allo :
- Verify that SqueezeLite is activated
NAS (Synology) - LMS :
- Step 1 : Select your device
- Step 2 : Select your media source
- Step 3 : Scan your librairy
Player :
- Connection using USBridge IP¨adress
2. DietPi Configuration
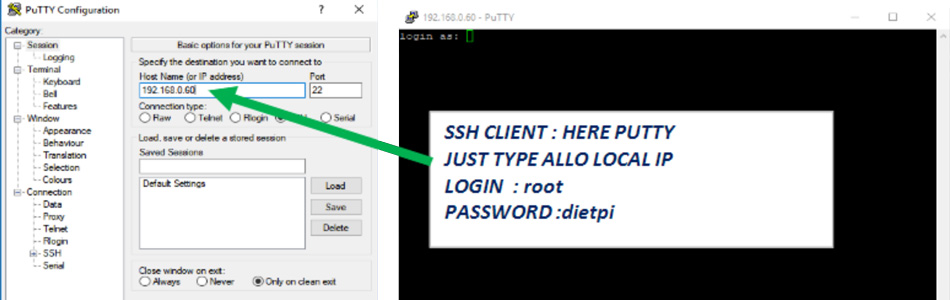
The first step in this tutorial is to configure DietPi. To do this, we will have to go through a few command lines. Install an SSH client to be able to run these commands remotely. Here we use PuTTY, a completely free software. Enter the IP address of your Allo USBridge. By default, the login is root and the password is dietpi.
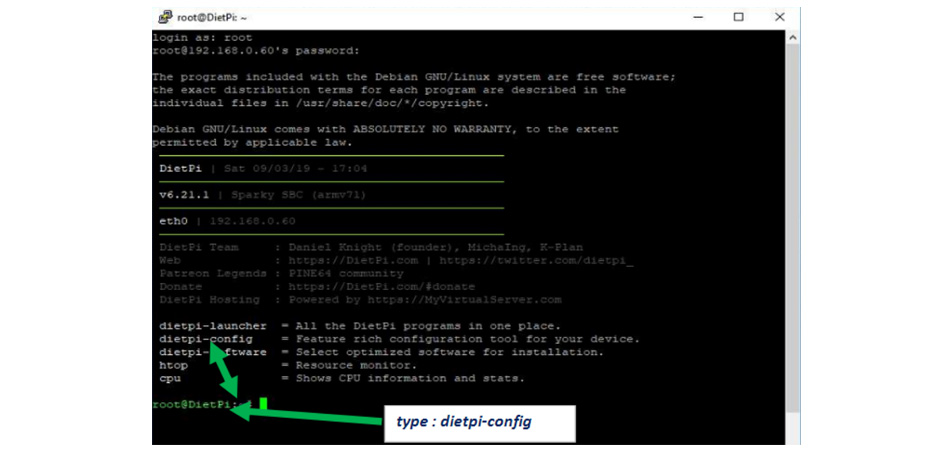
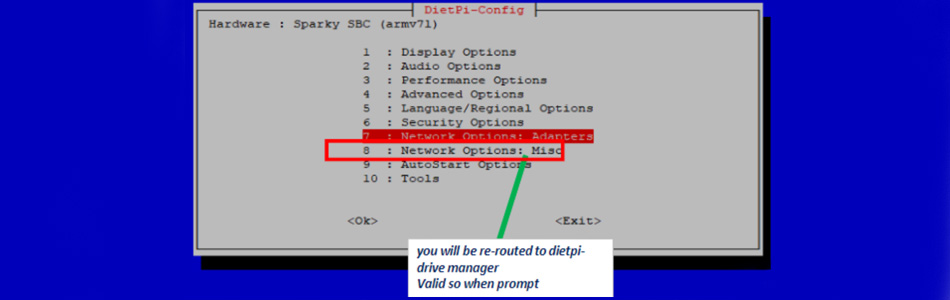
Once connected, type the command dietpi-config. This will open a DietPi configuration interface.
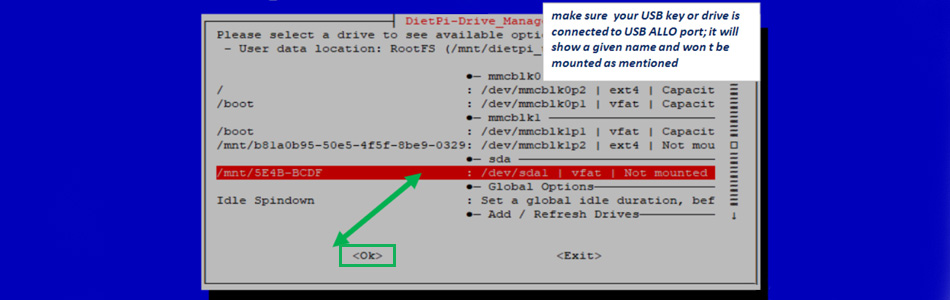
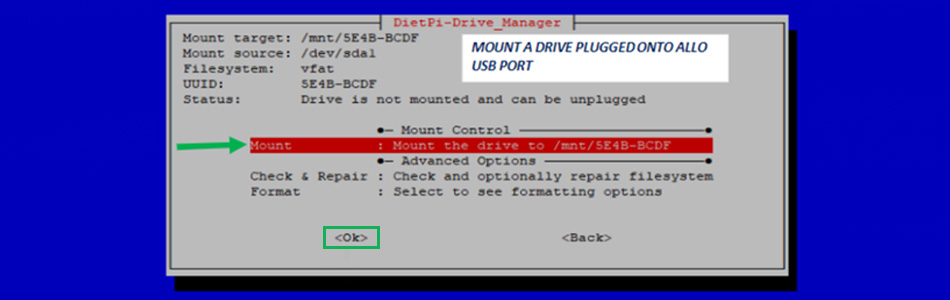
In this interface, select the option 8 : Network Options : Misc. This choice will open the interface DietPi-Drive_Manager. Make sure your USB storage device is connected to the USB port of your USBridge. This USB device should appear in the list with the mention Not Mounted. Select it and click on OK. Select the option Mount and confirm by pressing OK.
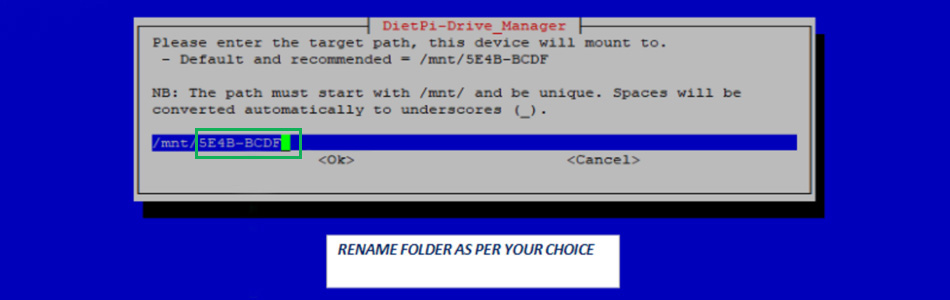
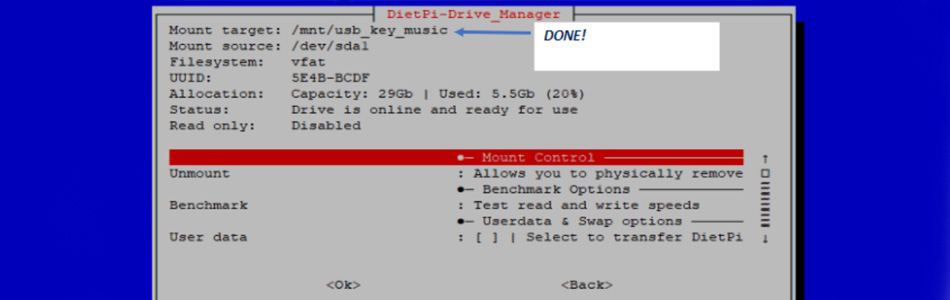
In the next window, you are free to rename the folder. Then validate your choice. The name of the previous folder assigned is then displayed on the Mount target line, confirming that the previous steps have been successfully completed.

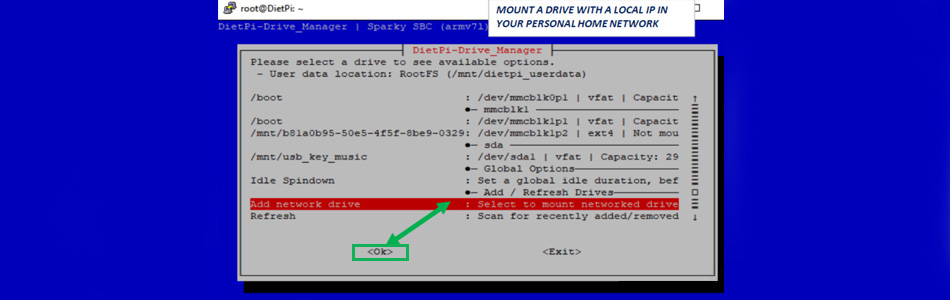
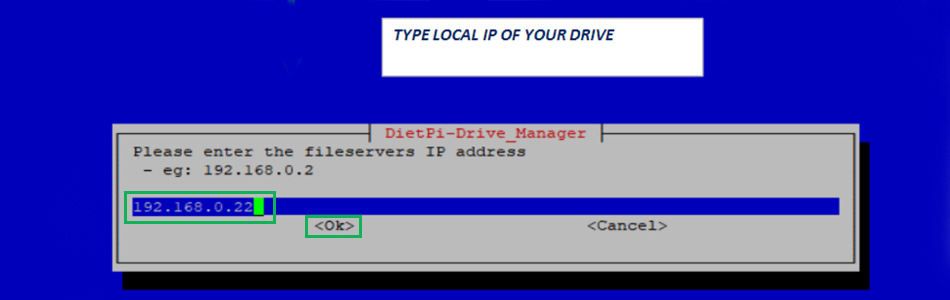
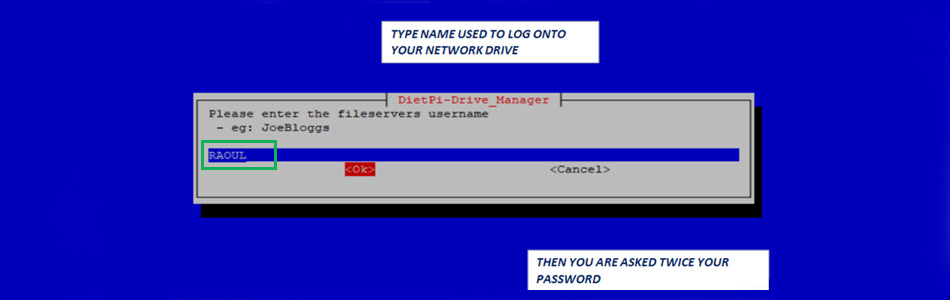
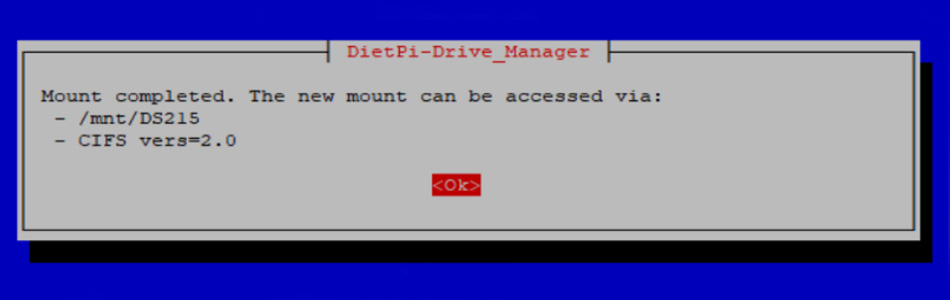
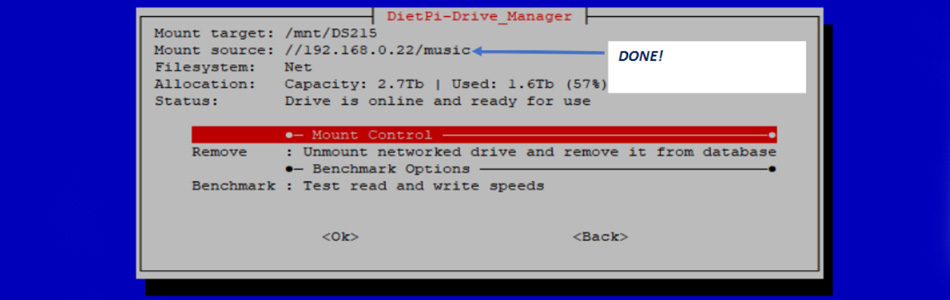
To add a network device, select the option Add network drive and validate. In the next window choose the Samba protocol and press OK. Then enter the IP address of your network device. Finally, enter the name to use for connecting to the network device. A new window appears to indicate that the network device has been added and to indicate the access method. The path is then displayed on the line Mount source.

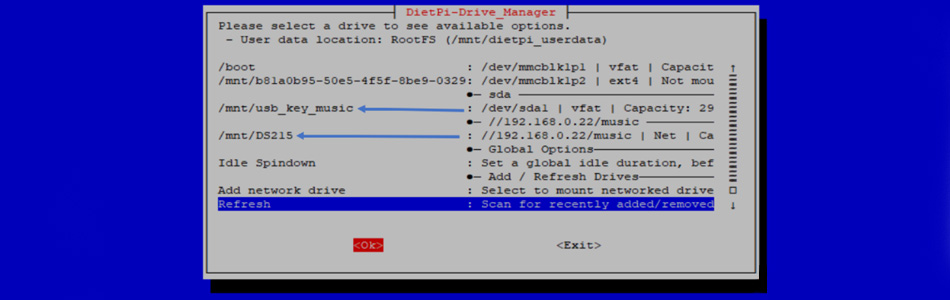
You can then see that your two devices, USB and network, have been mounted correctly.
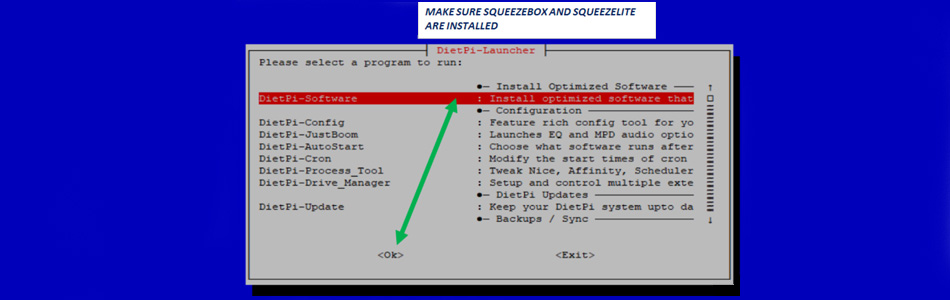
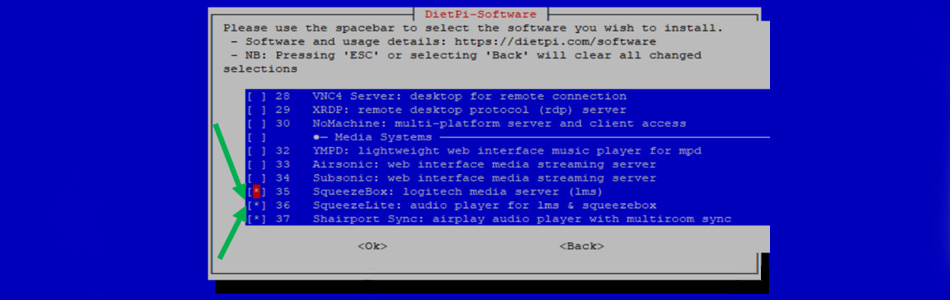
It is now necessary to ensure that SqueezeBox and SqueezeLite are properly installed. To do this, in the DietPi-Launcher interface, select the DietPi-Software option.
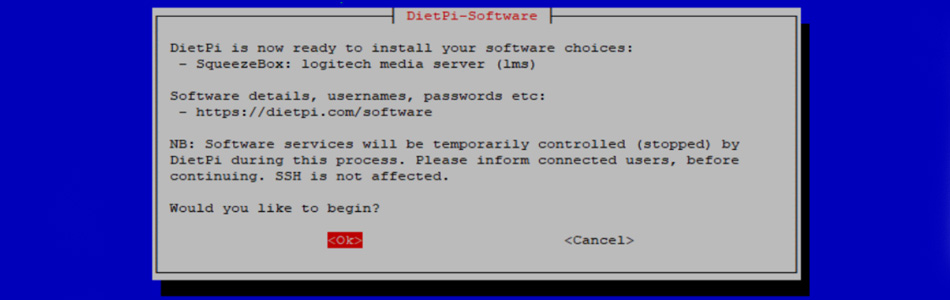
Once in the DietPi-Software interface, choose the SqueezeBox and SqueezeLite software and validate to install them. In the window asking you if you want to install these two programs, confirm by pressing OK.
The configuration part of DietPi is now complete. We can therefore switch to the LMS tracing parameter.
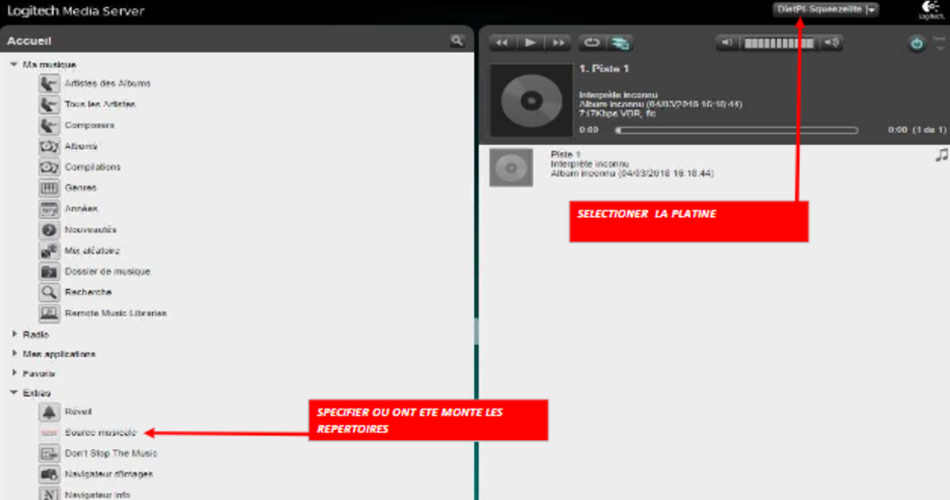
3. LMS Configuration
This last step consists of configuring LMS. Start with elect your board at the top right of the LMS interface. Then click on the button Music Source to be able to specify the location of your folders.
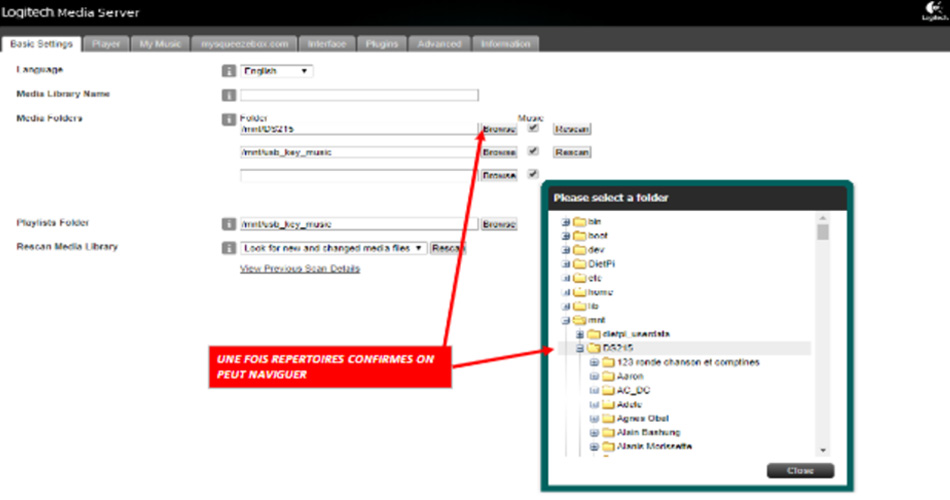
On the next screen, Music Source, select DietPi. The two directories shown in the previous step, your USB storage device and your network device, appear.

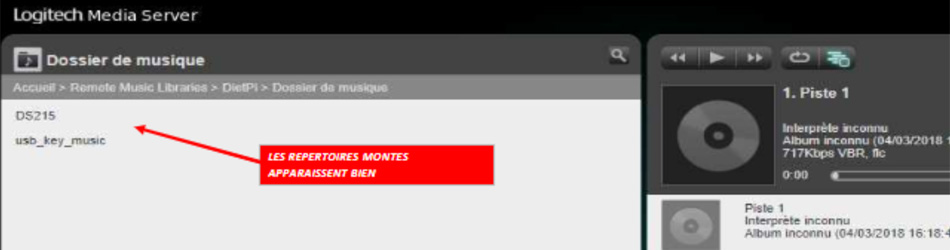
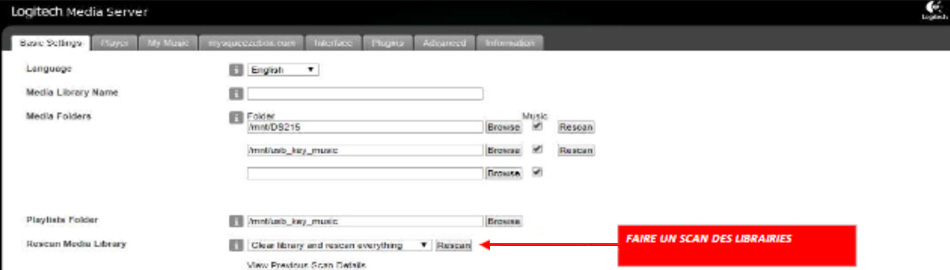
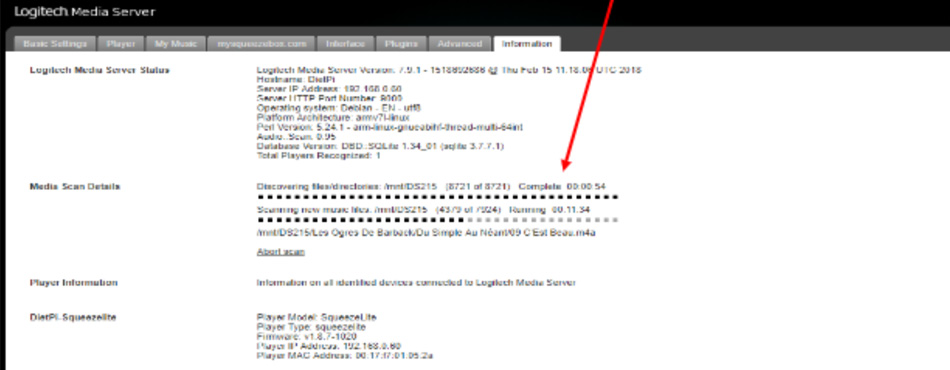
You can then browse through your folders to select those containing your audio files. Then do a scan of the libraries. LMS will then display that the scan is complete.
Now you can enjoy all your audio files and control playback directly from LMS!
We would like to thank Christophe Prigent for writing this guide.
Produit en rapport avec cet article
Rechercher dans le blog
Blog categories
Latest Comments

Audiophonics Team
on DIY Tutorial - PiCorePlayer - Installing...
Pierre Bommel
on Lecteur réseau Opensource : Solutions
Pierre Bommel
on DIY Tutorial - PiCorePlayer - Installing...
Audiophonics Team
on Tutorial DIY - Power cable ELECAUDIO CS-331B


![[GRADE B] DAYTON AUDIO MKSX4 Low Profil Subwoofer Speaker 160W Ø20cm](https://www.audiophonics.fr/72897-thumb_default/dayton-audio-mksx4-low-profil-subwoofer-speaker-160w-o20cm.jpg)

![[GRADE S] SHANLING M6 PRO HiFi DAP Compact Music Player DAC 2x AK4497 32bit 768kHz DSD128 Titanium](https://www.audiophonics.fr/72951-thumb_default/shanling-m6-pro-hifi-dap-compact-music-player-dac-2x-ak4497-32bit-768khz-dsd128-titanium-sbs.jpg)
![[GRADE S] SHANLING M0 PRO Compact HiFi Digital Audio Player DAP DAC 2xES9219C Bluetooth 5.0 aptX LDAC 32bit 384kHz DSD Green](https://www.audiophonics.fr/72945-thumb_default/shanling-m0-pro-compact-hifi-digital-audio-player-dap-dac-2xes9219c-bluetooth-50-aptx-ldac-32bit-384khz-dsd-green-sbs.jpg)
![[GRADE S] SHANLING UA1 PLUS Portable USB-C DAC / Headphone Amplifier 2xCS43131 32bit 768kHz DSD512 Black](https://www.audiophonics.fr/72936-thumb_default/shanling-ua1-plus-portable-usb-c-dac-headphone-amplifier-2xcs43131-32bit-768khz-dsd512-black-sbs.jpg)