New Customer?
Create your accountNo products
Prices are tax included
How to install speaker cables?
When installing your audio system, you will need to connect your amplifier and speakers together using a cable. The most effective method is to use a cable without a banana or fork plug, as the contact between the terminals and the cable conductor is then maximum.
This guide details the steps to connect your speakers to your amplifier simply and quickly.

Step 1 : Tools
To strip the cable, simply equip yourself with a stripping chip, allowing you to remove a piece of sheath without cutting the conductor. If the cable is too large, it is better to use a cutter.
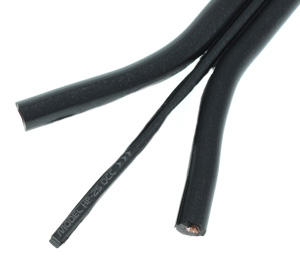
Step 2 : Split the cable
Most of the time, a speaker cable sold by the metre is itself made of two cables. Separate them by about ten centimetres by pulling the two cables in opposite directions.
Here we are using Elecaudio HP-25OCC.
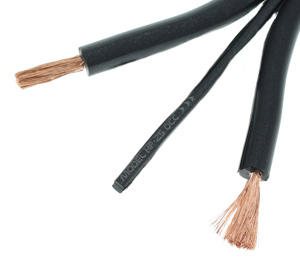
Step 3 : Strip the cable
Strip your cable 2cm on each side to expose the copper conductors.
If you use a stripping pliers for this step, it has markings corresponding to the different cable diameters. Choose the location with the marking corresponding to the diameter of your cable.
If you use a cutter, then simply cut the sheath 2cm from the ends, taking care not to cut the wires that make up the conductor.
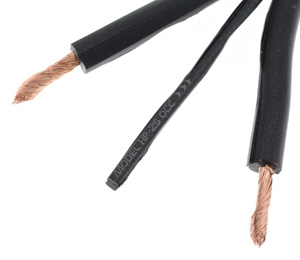
Step 4 : Form a tip
Once stripped, rotate the wires of each conductor between your fingers to form a tip.
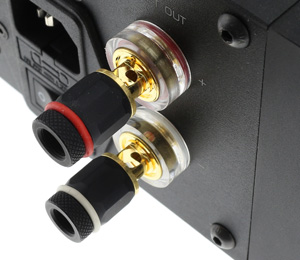
Step 5 : Unscrew the amplifier terminals
Unscrew the amplifier terminals by turning them to the left until the contact hole is fully visible.
For this guide we are using the Armature Phobos integrated amplifier.
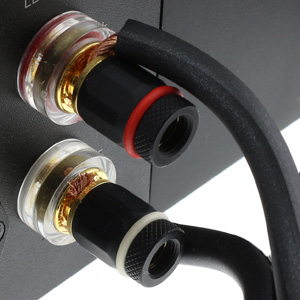
Step 6 : Connect the cables to the amplfier
To connect the cables to the amplifier, run one conductor from one end of the cable through the + (positive) terminal block and the second conductor from the same end through the - (negative) terminal block. Make sure that drivers do not touch each other. Screw the terminals back on by turning them to the right this time.
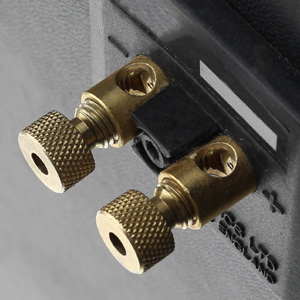
Step 7 : Unscrew the speaker terminals
Unscrew the speaker terminals by turning them to the left until the contact hole is fully visible.

Step 8 : Connect the cables to the speakers
To connect the cables to the speakers, run one conductor from one end of the cable through the + (positive) terminal block and the second conductor from the same end through the - (negative) terminal block. Be sure to observe the polarity according to the previous connection made to the amplifier. The conductor connected to the + (positive) terminal block of the amplifier must be connected to the + (positive) terminal block of the speaker. The conductor connected to the amplifier terminal block - (negative) must be connected to the speaker terminal block - (negative). Also make sure that drivers do not touch each other. Screw the terminals back on by turning them to the right this time.
Polarity is often color-coded on terminals and cables. Red for positive (+) and black or white for negative (-). This colour code will help you to find your way around easily when you connect.
The connection of your speakers to your amplifier is now complete. If your entire system is operational, then you are ready to enjoy your music!
Rechercher dans le blog
Blog categories
Latest Comments

Audiophonics Team
on DIY Tutorial - PiCorePlayer - Installing...
Pierre Bommel
on Lecteur réseau Opensource : Solutions
Pierre Bommel
on DIY Tutorial - PiCorePlayer - Installing...
Audiophonics Team
on Tutorial DIY - Power cable ELECAUDIO CS-331B


![[GRADE B] DAYTON AUDIO MKSX4 Low Profil Subwoofer Speaker 160W Ø20cm](https://www.audiophonics.fr/72897-thumb_default/dayton-audio-mksx4-low-profil-subwoofer-speaker-160w-o20cm.jpg)

![[GRADE S] SHANLING M6 PRO HiFi DAP Compact Music Player DAC 2x AK4497 32bit 768kHz DSD128 Titanium](https://www.audiophonics.fr/72951-thumb_default/shanling-m6-pro-hifi-dap-compact-music-player-dac-2x-ak4497-32bit-768khz-dsd128-titanium-sbs.jpg)
![[GRADE S] SHANLING M0 PRO Compact HiFi Digital Audio Player DAP DAC 2xES9219C Bluetooth 5.0 aptX LDAC 32bit 384kHz DSD Green](https://www.audiophonics.fr/72945-thumb_default/shanling-m0-pro-compact-hifi-digital-audio-player-dap-dac-2xes9219c-bluetooth-50-aptx-ldac-32bit-384khz-dsd-green-sbs.jpg)
![[GRADE S] SHANLING UA1 PLUS Portable USB-C DAC / Headphone Amplifier 2xCS43131 32bit 768kHz DSD512 Black](https://www.audiophonics.fr/72936-thumb_default/shanling-ua1-plus-portable-usb-c-dac-headphone-amplifier-2xcs43131-32bit-768khz-dsd512-black-sbs.jpg)