New Customer?
Create your accountNo products
Prices are tax included
Use the UMIK-1 with the MathAudio Room EQ plugin for Foobar2000
The MiniDSP UMIK-1 is the ideal tool to accompany a analysis and audio equalization software. This article will guide you through the installation of the UMIK-1 microphone for use with the MathAudio Room EQ plugin for Foobar2000.
1. Retrieve a calibration file
Go to the page of UMIK-1 of the MiniDSP site and enter the serial number of your microphone in the field provided. The serial number is directly visible on your microphone in the form of "xxx-yyyyyy". Press the Submit button and save the file on your computer.
The calibration file ensures that your microphone is as accurate as possible. Each microphone has a unique calibration file, which is why it is necessary to enter the serial number.

Example of a calibration file for UMIK-1 microphone
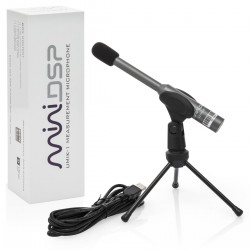
2. Connect the UMIK-1
Mount the UMIK-1 on the supplied bracket or any other microphone bracket of your choice. Connect the UMIK-1 to your computer using the supplied USB cable.

3. Install the Foobar2000 player and MathAudio Room EQ plugin
Download the latest stable version of Foobar2000 from the official website and install the software on your computer.

Download the latest version of the plugin MathAudio Room EQ on the official website. Install the plugin on your computer:
- Step 1 : Open the Foobar2000 configuration menu (File > Preferences or CTRL+P)
- Step 2: In the left menu, go to the tab Components
- Step 3: Click on the Install button and select the previously downloaded archive on the MathAudio site, or simply drag it to the list.
- Step 4 : Press the OK button. You will be asked to restart Foobar2000 to load the new component.
4. Start the MathAudio Room EQ plugin for Foobar2000
Start Foobar2000 and click on File > Preferences > DSP Manager.

Select MathAudio Room EQ in the right panel and click on the left arrow to activate it.

Click on the button Apply then on the button Selected Settings to open the plugin interface.

5. Switch the plugin to measurement mode
- Select the radio button Room Measurement to activate the mode Room Measurement (part measurement).
- Select the left microphone input (Left/L) using the radio buttons Mic Input. Then click on the In/Out button and select the UMIK-1 microphone input.

- Make sure that the Mic Signal Indicator shows the presence of a microphone signal in red.
Note: the plugin Room EQ stops the signal in measurement mode, so that you do not hear the sound of the microphone in your speakers. - Copy your calibration file to the folder Documents > MathAudio Room EQ. Then exit Foobar2000 and restart the new one. The name of the calibration file will be displayed in the upper right corner of the plugin's graphic display Room EQ.

6. Measuring the frequency response of your room and speakers
- Plan to make 5 to 20 measurements. The measurement points must be uniformly distributed throughout the room at all possible locations for listeners.
- Place the microphone at ear height in an upright position. It should not be placed near objects that reflect or absorb sound waves. It may be convenient to use a tripod.
- Click on the button Start Measurement to start the measurement.
- Wait until the end of the measurement (about 10 seconds). Then move the microphone to the next measurement location and click on the Yes button in the window that appears. Repeat this procedure at all necessary locations. Click on the button No in the window that appears when you finish your last bar. The frequency response curves are then displayed.
- Click on the Save Preset button to save the frequent response of your speakers in a .snr file.

7. Switch the plugin to Room EQ mode
Click on the radio button Room EQ.
8. Balance your speakers
Sometimes the balance of the speakers is not perfect (one speaker is stronger than the other). If this is the case, you can click on the radio button Stereo Balance ON to compensate for this defect. You can skip this step if the frequency response of the left and right channels of your speakers is similar.
9. Choose the reference frequency response
Click on the radio button Bright to get an ideal standard flat frequency response or click on the radio button Neutral if you want an ideal frequency response with roll-off h.f. This last response in reference frequency will ensure a more neutral sound.
10. Move the vertical cursor down
Move the vertical slider down and release it to cut off some of the main resistors, as shown below.

The processed frequency response resulting from your room and speakers will be indicated by a continuous white line. It can be seen that the main responses of the processed frequency response (solid white line) have become much smaller. Such resonances add an artificial timbre to the sound. The elimination of these causes a significant improvement in sound reproduction.
It is also possible to see that the trap equalizer MathAudio Room EQ does not boost the spectrum components located below the dotted line. This function is important because it prevents large excursions of the speaker membrane that can be caused by the ideal linearization of the frequency response. As a result, you will not get the fuzzy sound that is unique to conventional linear equalizers.
11. Compare processed sound of your speakers with their original sound
Make sure that the radio button Room EQ is selected as shown in image (a) below. Start playing music. Keep in mind the sound reproduction with processing. Then click on the radio button Bypass to listen to the original sound (without processing) and move the cursor Bypass Signal Volume to the left until the volume of the original sound is equal to the volume of the line sound: an equal sound level is required to properly compare the processed and original sound reproduction. Switch from Room EQ à Bypass modes to adjust the cursor until the sound levels of processed and unprocessed sounds are equal. You can now compare the quality of processed and unprocessed sounds.

12. Changing the vertical cursor position and repeat the test
It is necessary to perform some tests to find the optimal location of the vertical cursor. Too high a position of this slider may cause too little improvement in frequency response and too low a position may result in too many excursions of your speaker diaphragms and non-linear distortion. The optimal position of this vertical slider corresponds to the highest fidelity and sound transparency.
Gently move the vertical cursor up and down and compare the processed and unprocessed sound. Remember to adjust the volume level of the original sound to make a good comparison of processed and unprocessed sounds. Changing the vertical cursor position allows you to adjust the shape of the response curve in frequency.

Repeat these tests with different vertical cursor positions and choose the one with the best results for permanent use.
13. Save preset
Click on the Save Preset button to save the created profile in a.snr file. This file will allow you to restore the state of your plugin if necessary.
Now you can enjoy your music with the right processing to get the best possible playback!
Produit en rapport avec cet article
Rechercher dans le blog
Blog categories
Latest Comments

Audiophonics Team
on DIY Tutorial - PiCorePlayer - Installing...
Pierre Bommel
on Lecteur réseau Opensource : Solutions
Pierre Bommel
on DIY Tutorial - PiCorePlayer - Installing...
Audiophonics Team
on Tutorial DIY - Power cable ELECAUDIO CS-331B


![[GRADE B] DAYTON AUDIO MKSX4 Low Profil Subwoofer Speaker 160W Ø20cm](https://www.audiophonics.fr/72897-thumb_default/dayton-audio-mksx4-low-profil-subwoofer-speaker-160w-o20cm.jpg)