New Customer?
Create your accountNo products
Prices are tax included
Allo DietPi installation & configuration of a USB Bridge Signature via its Web interface
While the DietPi distribution is highly appreciated for its power and numerous features, the solution is nevertheless not very accessible to users who are new to Linux systems and not well versed in terminal-based configurations.
To take advantage of DietPi's excellent Audio capabilities on its USB Bridge Signature, Allo has developed a very intuitive web interface. It is ideal for users taking their first steps in DietPi. This step-by-step tutorial will show you how to access and use it to enjoy all the DietPi features on your Allo USB Bridge Signature.
This guide is intended to provide a sequence of step-by-step, detailed instructions that can be understood by complete novices.
In this regard, it may seem a bit lengthy to more experienced users.
#1 Connect the hardware
First of all, make sure that the SD card is inserted in its slot (on the front panel).

Your USB-Bridge must be connected to the network in order to work. You can use an RJ45 cable (wired connection) or a USB WiFi dongle (wireless connection) to connect it to the network.
For the first start-up of the device, it is very strongly recommended to use an Ethernet cable (RJ45) which has the merit of working right away the first time.
You can connect the USB audio device before or after powering on. This does not affect the proper operation of the system. Also, it does not matter if you disconnect / reconnect / switch the USB device while the USB Bridge signature is already on.
For the rest of this guide, we will assume that your USB output is already connected to your USB DAC / FDA (or any other compatible output device).
Finally, connect the power supply to turn on your USB Bridge Signature. The USB Bridge Signature turns on automatically when it receives power.
#2 First power up
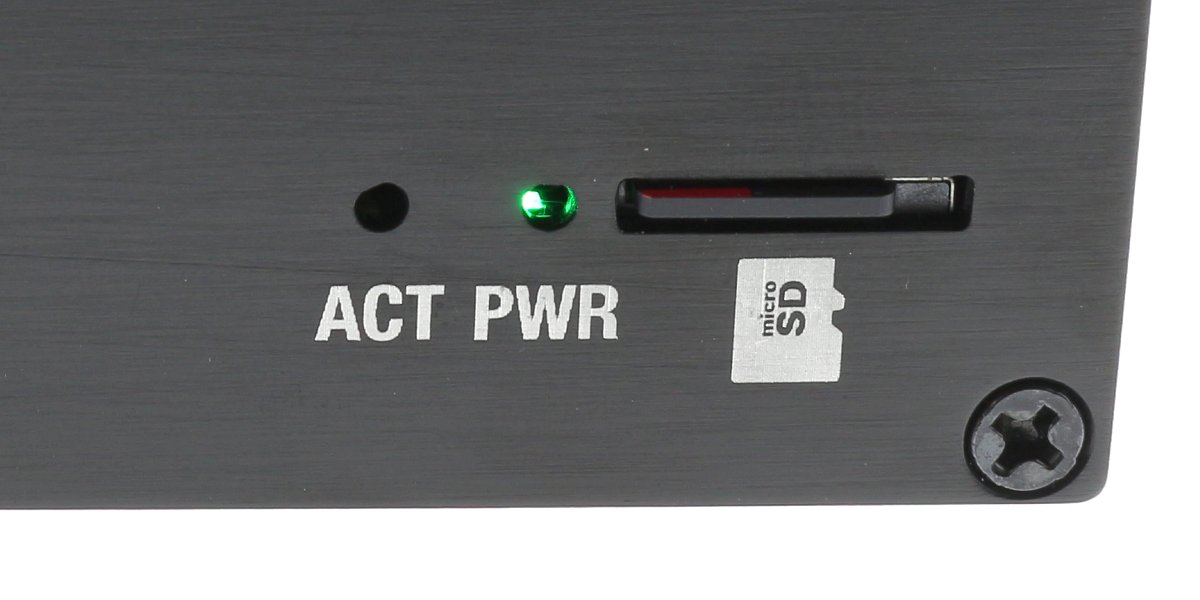
The first time you turn on your USB-Bridge Signature, look carefully at the LEDs on the front panel. You can see two LEDs : ACT and PWR.
The PWR diode is the easiest to interpret since it simply tells you that the device is powered. If you have connected a power supply adapted to the USB Bridge Signature specifications (5V / 2A min) and this LED does not light up, check that your power supply is working properly and change it if necessary.
The ACT diode has two functions.
- Monitor software activity: the LED lights up when the logic circuits are working.
- Indicate possible problems at startup: the LED flashes regularly if the USB Bridge encounters a problem with the micro-SD card.
Since this is the first time you turn on your Allo USB Bridge Signature, it is the second function we will look at after plugging in the device.
We are not going to detail here all the possible flashing sequences. Just remember the following general rule:
If the ACT diode flashes quickly and irregularly when switched on, then everything is fine.
Once the USB Bridge has finished booting up, the ACT LED will stabilize and remain mostly off until you send new instructions. The device is ready to use.
Of course, you don't need to check the diodes every time. Just do it to check that everything is in order the first time you turn on the power or if you have any doubts about the proper functioning of your SD card.
#3 Find the network address of your USB Bridge
Now that your Allo USB Bridge Signature is turned on and started, it's time to put it to work.
The first step is to find its network address in order to be able to send it all the commands necessary for its configuration.
If you have been paying attention to the introduction of this guide, this idea may seem to contradict what was mentioned earlier. We have indeed specified that the Allo solution did not require sending orders. In reality, it's a little more subtle than that.
The web interface provided in the Allo DietPi distribution gives you access to all the options from a web page accessible from your local network and automatically converts and sends everything you do there into commands understandable by the USB Bridge Signature.
This means that you don't need to use a command terminal, the Allo web interface does it for you. However from the point of view of your USB Bridge, it makes no difference and commands are received and interpreted in the same way. The network address of the Bridge will be used here to access the web interface in question.
To find the network address of your Bridge, you have several options: use a network scan software or connect a display to the HDMI output of the Bridge.
Find the address of your Bridge by scanning your network
The easiest solution is to use a third party software that will scan your local network and give you a kind of directory where you can easily find your Bridge. At Audiophonics we use a program called "Angry IP Scanner" which is extremely light, simple and works on Windows as well as on MAC and Linux. (If you are on Android, don't panic, applications such as Network IP Scanner perform exactly the same function).
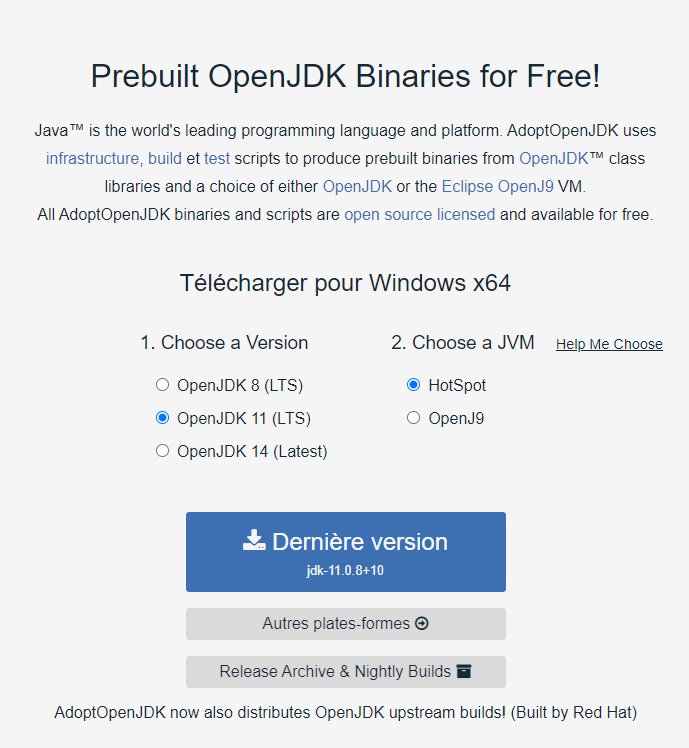
Start by downloading the software by following this link (opens a new window).
Select the version corresponding to your operating system, download and run the installation file.
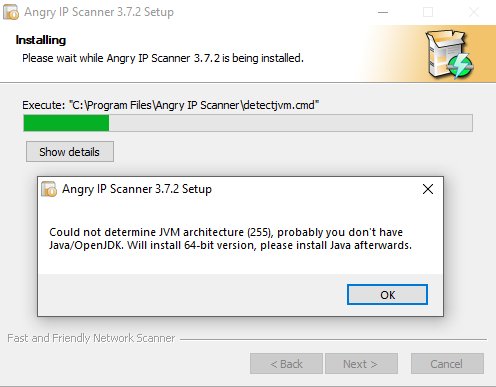
You may see this message appear during installation. Don't panic, it just means that your computer does not know how to use JAVA files. Click Ok and finish the installation normally.
Once the installation is complete, launch the Angry IP Scanner software.
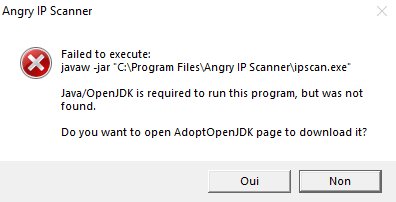
If you had a message about JAVA during the installation, you will see this new window open. Click on "YES". Your web browser will open on the JAVA installation page.
Just click on "LAST VERSION" (everything is pre-configured) to start downloading the missing installation file. Execute the file in question and let the installation wizard guide you (the basic options are enough).
Once the installation is complete, run Angry IP Scanner again.
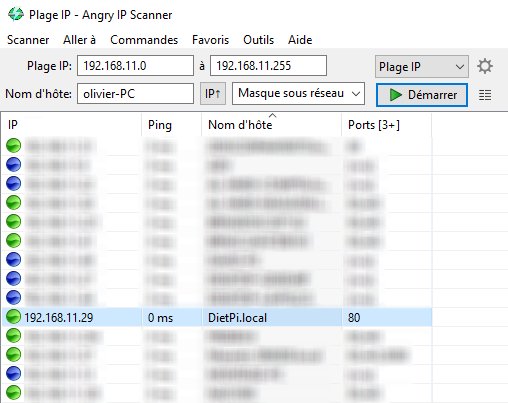
You are now in the Angry IP Scanner interface. It's really easy to use since you just have to click on the "Start" button and let the software do its job.
When the scan is complete, click on the top of the third column (where it says "Hostname") and click "Sort by Hostname" in the subsequent drop-down menu.
Find the row containing a host named DIETPI (or dietpi.local) and note the contents of the first column (IP) for this entry. On the picture above you can see that my router has assigned the address 192.168.11.29 to my USB Bridge.
Warning, this address is valid on MY network, your Bridge on your network will have a different address.
Find the address of your Bridge by connecting a screen to it
A second, more expedient method is to connect a display directly to the HDMI port of your USB Bridge.
Here's what you should see:
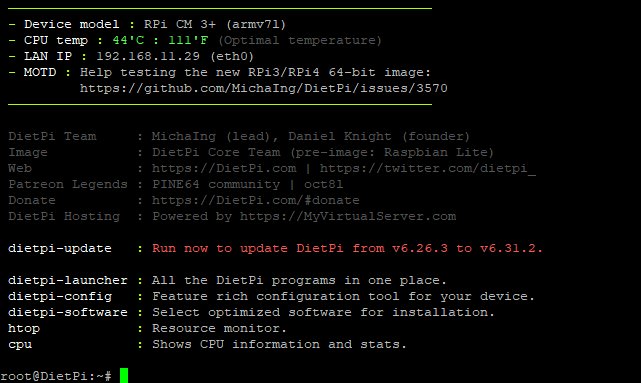
You will find the network address on the third line. Copy it without taking into account the mention in brackets (eth...) or (wlan...).
Here we see that my USB Bridge has received the address "192.168.11.29".
While this second method may seem faster and simpler, I personally do not recommend it. In addition to requiring a screen with a free HDMI input (or undoing connections on busy screens), this method is specific. This means that it only works with network devices that have a screen connector (which is far from always being the case).
On the other hand, the first method of scanning your network to identify and connect to devices will work with all network devices indiscriminately.
It is therefore a good idea to familiarize yourself with the first method that will work every time and with all types of devices that can be used without having to unplug / plug anything. This way you won't have to relearn everything if one day you acquire a DietPi player without a screen port.
Other even simpler methods exist but will not work all the time. For example Windows is sometimes able to resolve the network address of the Bridge by substituting "diepti.local" but this technique has many limitations (will not work properly if you have several DietPi devices on your network, may depend on the configuration of your internet box / network router and the version of the distribution integrated in the Bridge, never works under Android...etc).
#4 Login to the Allo Web Interface
Your Allo USB Bridge Signature is now turned on, connected to the network and you have noted its network address. It's time to discover the Allo web interface.
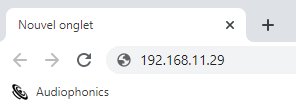
To do this, open your internet browser and copy the Bridge's IP address directly into the browser bar (as if you were writing the URL address of a website).
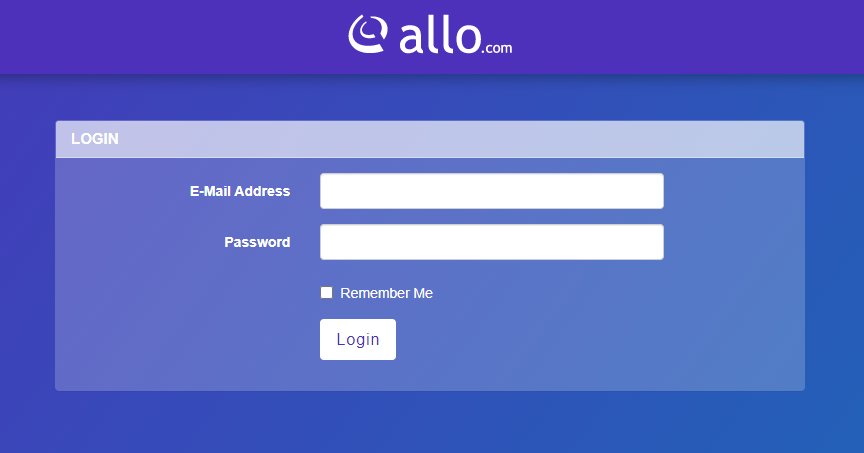
You are now on the home page of the Allo web interface. The latter will ask you for a login and a password.
Type "admin@allo.com" (without quotes) in the E-Mail Address field. Type "allo" (without quotes) in the Password field.
If you are wondering why the interface is protected by an identification form, remember that this is a network drive. Of course, it is only accessible from your local network, but if a neighbor or a malicious guest manages to connect to your WiFi network, it will not be able to damage your Bridge or undo its configuration.
Network drives are sometimes also used on public networks (hotels, stores...etc), in which case this security is simply indispensable.
Once connected, you are finally on the famous Allo Web interface:
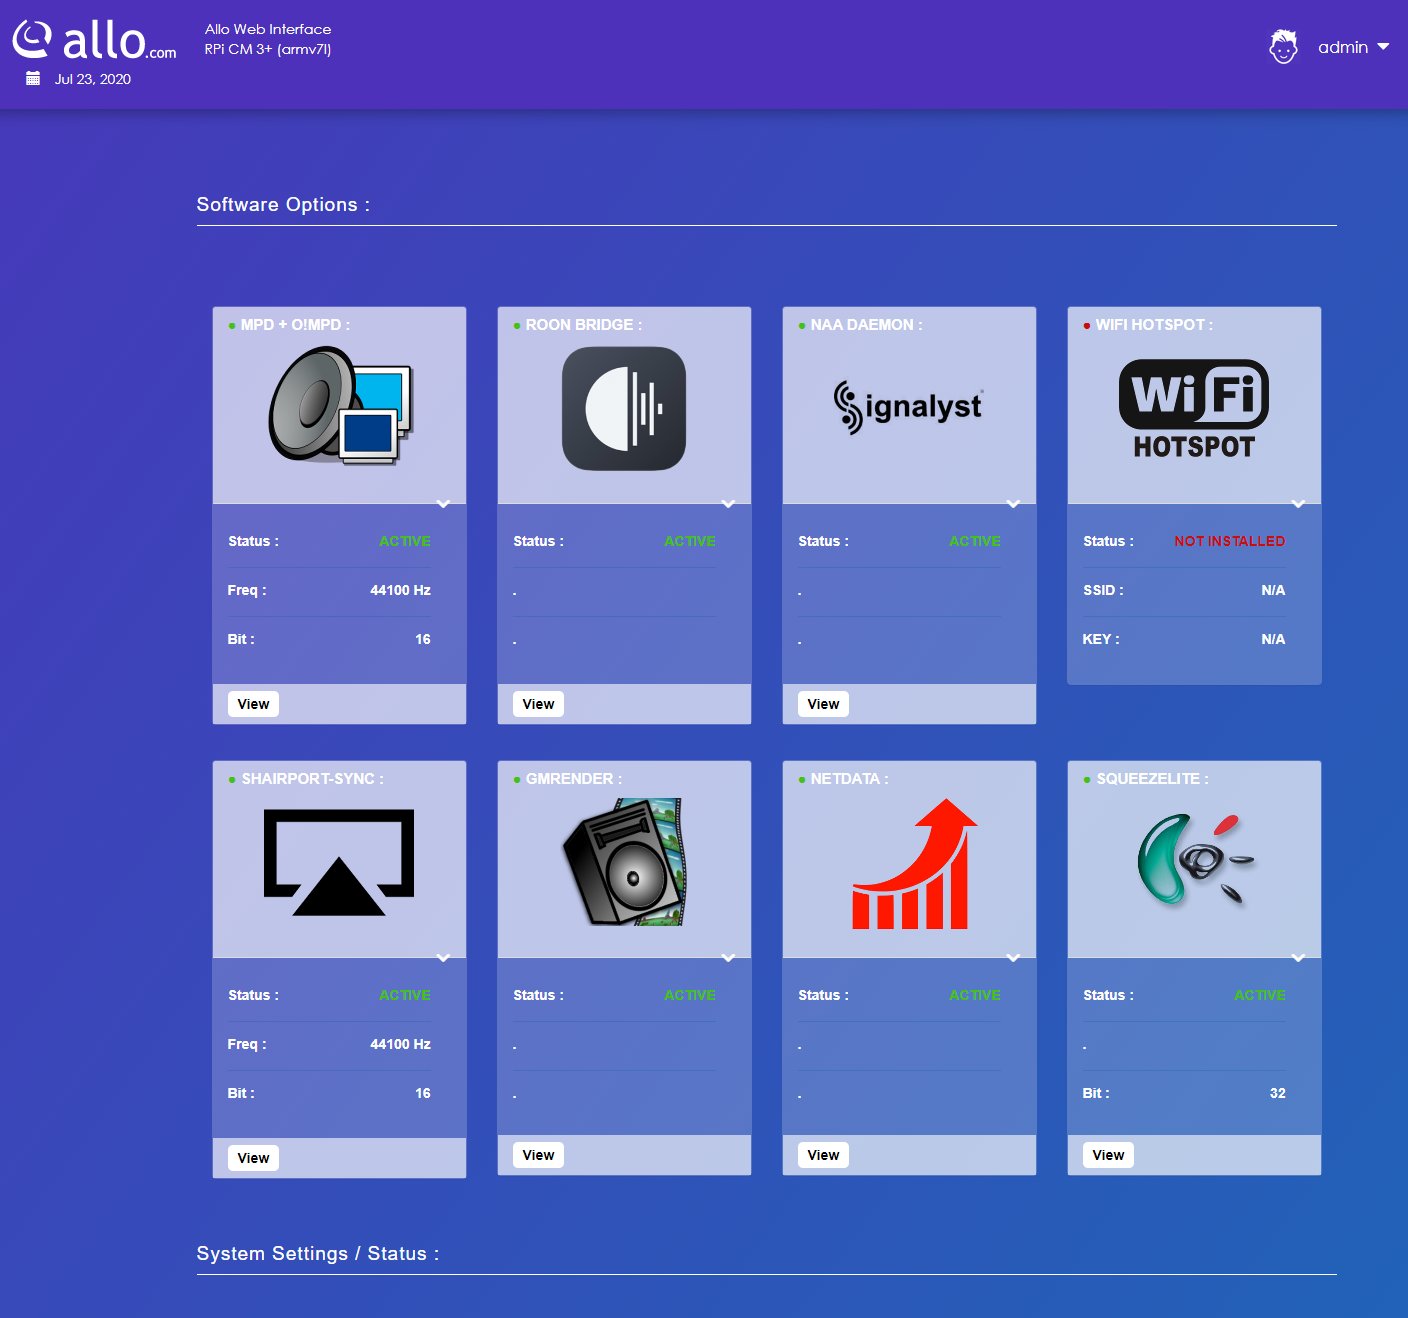
You probably want to start streaming music right away, but you'll have to be patient. You need to set up a few details to make sure everything is in order.
#5 Configure the Allo USB Bridge
To do so, always from the Allo DietPi web interface home page, scroll down. There you will find the following sections :

In the "SYSTEM SETTINGS" section, click the "VIEW" button. This action takes you to a new web page containing all the configuration information.
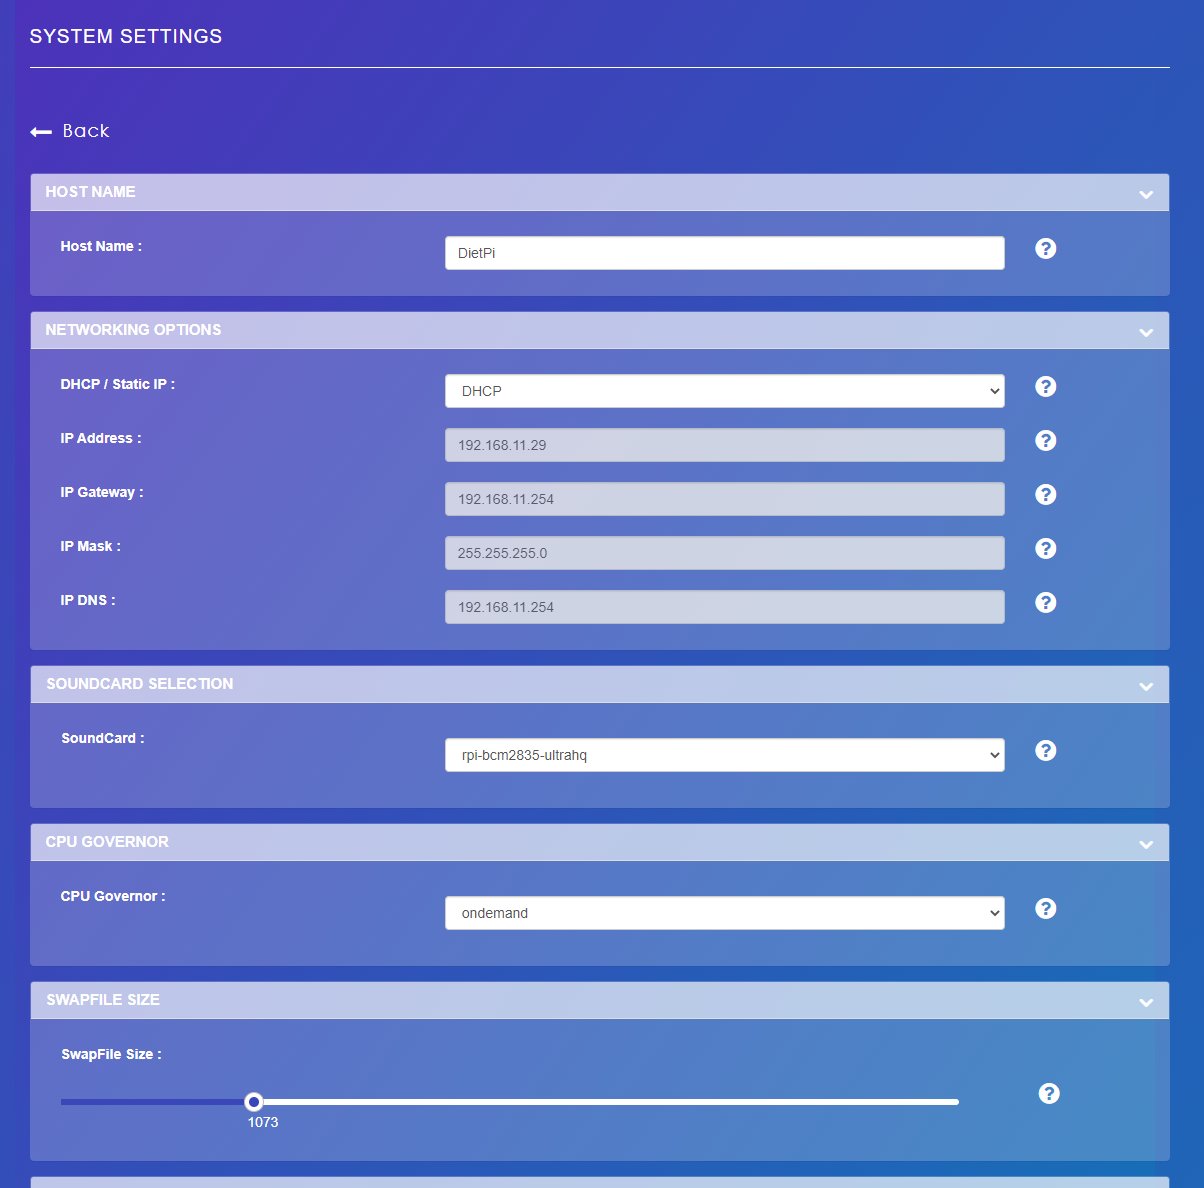
Among all the options available, take a look at the "SOUNDCARD SELECTION" section. This is where you will tell the system where to output the sound.
You may wonder why you need to specify the destination connector for audio output when the USB Bridge Signature has only one possible output for this purpose (its USB port).
To answer this question, remember that DietPi is a versatile distribution that is used on many other devices that sometimes have multiple audio outputs.
If you have not already done so, it is time to connect your Bridge to your DAC / FDA or other destination device. Wait a minute to make sure the connection is detected and select USB-DAC in the "Soundcard" field.

After this modification, scroll down to the very bottom of the page and click on the "SAVE CHANGES" button to validate the new parameters.
You will notice that many other options are available, but the audio output selection is the only one that is really necessary to play music at the moment.
Just above the button to validate your settings, you will also find a button to cleanly turn off the Bridge. It is not recommended to turn it off by unplugging it directly.
#6 Play music (Example with LMS)
Your Bridge is now ready and configured to play music. All that's left to do is to send it audio streams.
There are many ways to send your digital audio files to the Bridge. As an example we will show you how to play audio files via SqueezeLite / LMS from your Qobuz account.
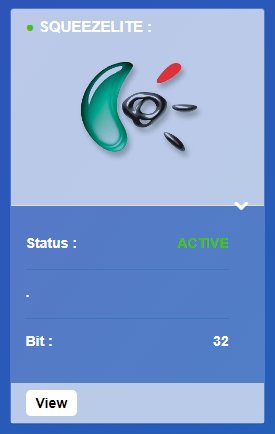
Go to the home page of the web interface. Check that the squeezlite otpion is set to "ACTIVE". If it is not, click "View" and then "Enable".
Now connect to the LMS port of your Bridge by typing its network address in the search bar of your web browser followed by ":9000" without quotes. In my case, I will have to type the address 192.168.11.29:9000.
The LMS interface asks you to login to your LMS account. This is an essential step to be able to use Qobuz on LMS. If you don't have an LMS account, you will be asked to create one. The operation only takes a few seconds.
Now click on the "Settings" button in the lower right corner to open a new tab / window. Go to the "Plugins" tab and look for the "Qobuz" option. Activate it if this plugin is not checked. Then open the plugin's parameters.

Once installed, all you have to do is enter your access codes:
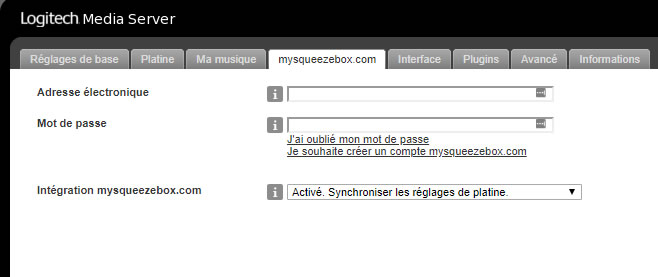
If you had not created and filled in your mysqueezebox account you can do it on this tab, this step is essential for the Qobuz plugin to work.
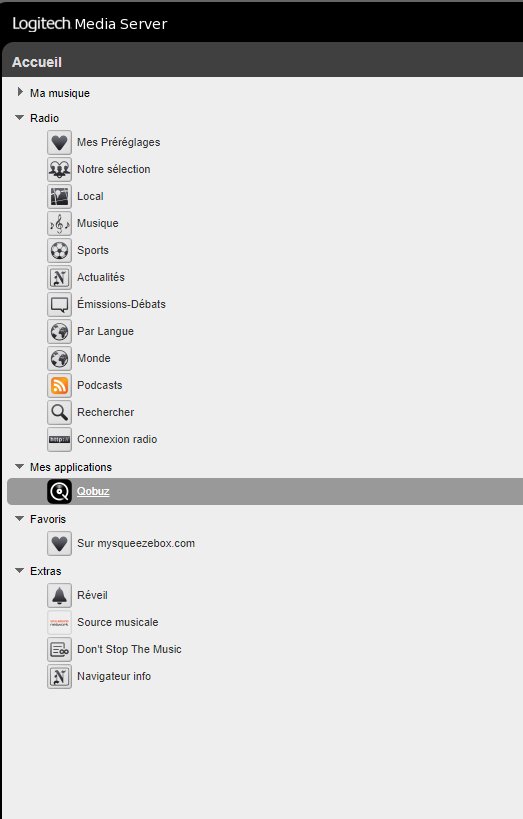
You can now access Qobuz and play audio tracks from the LMS interface.
Produit en rapport avec cet article
Rechercher dans le blog
Blog categories
Latest Comments

Audiophonics Team
on DIY Tutorial - PiCorePlayer - Installing...
Pierre Bommel
on Lecteur réseau Opensource : Solutions
Pierre Bommel
on DIY Tutorial - PiCorePlayer - Installing...
Audiophonics Team
on Tutorial DIY - Power cable ELECAUDIO CS-331B


![[GRADE B] DAYTON AUDIO MKSX4 Low Profil Subwoofer Speaker 160W Ø20cm](https://www.audiophonics.fr/72897-thumb_default/dayton-audio-mksx4-low-profil-subwoofer-speaker-160w-o20cm.jpg)