New Customer?
Create your accountNo products
Prices are tax included
DIY speaker design: the complete guide to HiFi sound
DIY Speaker
Driver, electronics and cabinet
Introduction to Speaker Building
This article is intended to provide guidance for building a DIY speaker. Here you will find a detailed list of suitable equipment as well as numerous suggestions and ideas to help you complete your DIY speaker project. If you are asking yourself the following questions, then this guide is for you:
What type of driver should you choose? How do you calculate the volume and dimensions of the speaker enclosure? Which electronic modules and components should you select: Bluetooth, amplifier, battery, connectors, etc.? Where can you find inspiration and achieve high-quality finishes?
But first of all, do you know how a speaker works?
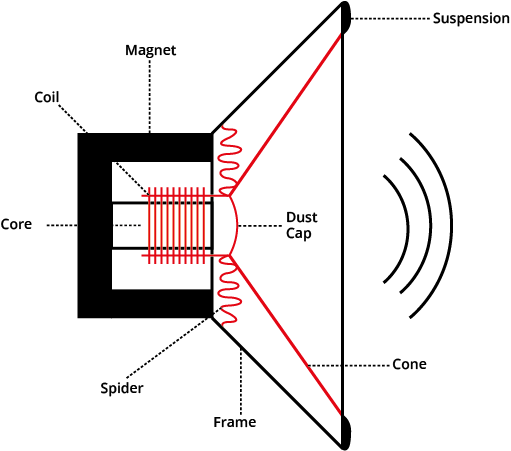
Let's start with the basics. Here is a simple definition of what a speaker is: a speaker consists of an enclosure (usually made of wood or PVC) and drivers that reproduce sound from an amplified electrical signal. Depending on whether they are passive or active, the audio amplifier may or may not be integrated into the speaker. There are also several electronic devices such as crossovers that distribute frequencies to the appropriate drivers.
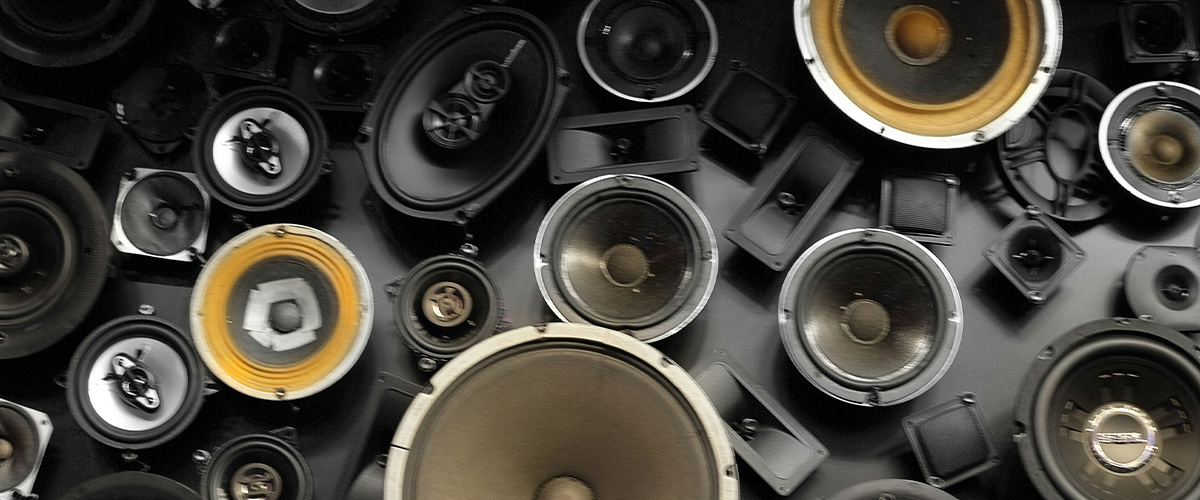
As you may have guessed, it is the vibration of the speaker diaphragm that reproduces sound by changing air pressure. The driver therefore converts an electrical signal into a mechanical signal. There are generally 7 types:
- Subwoofer for infra-bass frequencies
- Woofer for bass frequencies
- Midrange drivers for mid frequencies (Squawker)
- Tweeter for treble frequencies
- Supertweeter for ultra-high frequencies
- Full-range drivers reproducing the entire audible frequency spectrum (20Hz-20kHz)
- Passive radiators
What about Bluetooth speakers?
They operate on the same principles as conventional speakers but are generally smaller to allow portable use and, above all, incorporate a Bluetooth receiver module. The smallest models operate in mono, but it is of course possible to design a stereo model or even a mono model featuring several types of drivers thanks to crossovers.
OVERVIEW OF A SPEAKER DRIVER
Starting Point: Define the Desired Specifications
Before starting the design of a DIY speaker, it is essential to establish a proper set of specifications. This step helps guide the project and choose the most suitable components, whether for a self-powered Bluetooth speaker or a passive speaker intended for use with an external amplifier.
Audio Power:
The power output of a speaker mainly depends on the driver(s) used and the associated amplification. For a compact Bluetooth speaker, power generally ranges between 3W and 20W, which is sufficient for portable use. For a passive speaker or a more ambitious project, power can be much higher depending on the amplifier used. It is important to properly match the power handling of the drivers with that of the amplifier in order to avoid clipping or damage. The chosen configuration (full-range, 2-way, 3-way, etc.) will also influence power distribution and overall speaker performance.
Battery Life:
This criterion mainly concerns active and Bluetooth speakers. A portable speaker requires a battery, whose capacity (expressed in mAh) directly determines battery life. It is essential to choose a battery suitable for the power consumption of the amplifier module. For passive speakers, this constraint disappears, but you must ensure that the speaker is compatible with the external amplifier in terms of impedance and power handling.
Connectivity:
The choice of connectivity largely depends on the intended use. A Bluetooth speaker will generally integrate a wireless receiver module, but it may also be useful to add other inputs such as an auxiliary input (jack), RCA or even USB. In the case of a passive speaker, connectivity is generally limited to speaker terminals allowing connection to an external amplifier. There are many possible solutions: all-in-one modules with integrated amplification, DACs with Bluetooth, or fully passive systems.
Basic and Advanced Features
Features mainly vary depending on whether the speaker is active or passive. A Bluetooth speaker may include elements such as a power button, a pairing button, status LEDs, a battery level indicator, or playback and volume controls. Some even allow stereo pairing between two speakers or connection to multiple sources. In contrast, a passive speaker is generally free of onboard electronics, which simplifies its design but limits integrated features.
Dimensions and Design:
The dimensions of the speaker must be defined in accordance with the characteristics of the drivers, particularly the Thiele-Small parameters. The internal cabinet volume directly influences acoustic performance, especially at low frequencies. Depending on the project, it is possible to choose different enclosure types: sealed enclosure, bass-reflex enclosure, open baffle or even a horn-loaded enclosure. Design also plays an important role, both aesthetically and acoustically (diffraction, rigidity, damping).
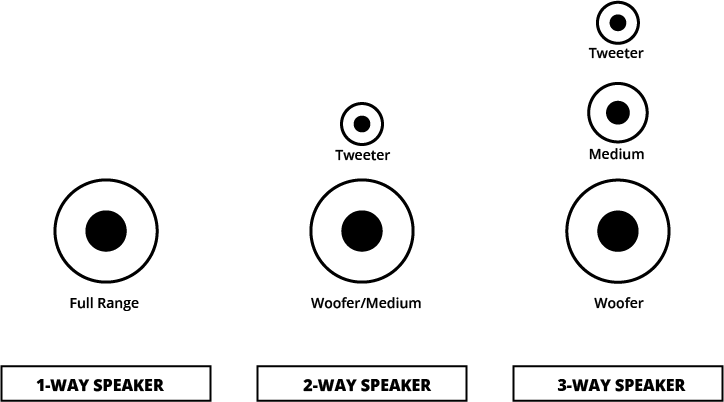
Choosing the Right Drivers
To properly select your drivers, we first need to look at several essential parameters: their type, power handling, impedance, sensitivity, and frequency response. The type of driver depends on the speaker configuration you wish to build: 1-way, 2-way, 3-way, or more. For example, a full-range driver is generally preferred for a 1-way speaker, while a 2-way design may use a woofer (bass/midrange driver) and a tweeter. Power handling and impedance must be chosen according to the amplifier. Make sure that the amplifier module is capable of properly driving your speaker driver and that the driver can handle the power delivered by the amplifier. Also ensure that the frequency response of each driver covers a wide range and complements the others effectively.
EXAMPLES OF DRIVER CONFIGURATIONS
The Case of Passive Radiators
Passive radiators, also known as "passive radiators" or "passive diaphragms," are key components in DIY speaker designs focused on achieving powerful bass reproduction without increasing the overall enclosure size. Unlike traditional bass-reflex ports, which use air to tune the enclosure, a passive radiator is an unpowered diaphragm without a voice coil or magnet that vibrates in response to pressure variations created by the active driver. This technology enhances low-frequency performance while eliminating turbulence and airflow noise often associated with poorly tuned ports. It is particularly useful in compact enclosures where using a long port is physically impractical. For speaker-building enthusiasts, passive radiators provide an elegant acoustic and aesthetic solution: they allow for a more linear bass response and better transient performance. However, it is essential to choose a passive radiator properly matched to the enclosure and woofer, as poor matching can result in bass dips or excessive bass emphasis. Integrating a passive radiator into a DIY speaker therefore requires some acoustic calculations, but the result can rival much more expensive commercial speakers.
Thiele and Small Parameters
A driver's Thiele and Small parameters describe its electromechanical properties and are essential for determining the appropriate enclosure type: bass-reflex, sealed, horn-loaded, or open baffle. These parameters are also used to calculate the optimal enclosure volume. In other words, they are essential and highly influential in the success of your DIY speaker project. To learn more, we recommend reading the dedicated article:
[GUIDE] Discovering Speaker: Understanding Thiele and Small Parameters
Here Are Some Popular Drivers Available in Our Catalog
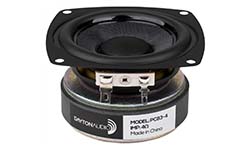

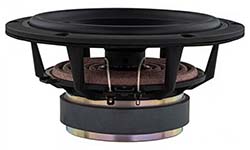
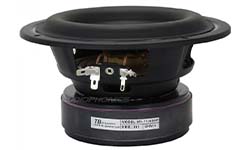
DAYTON AUDIO SIG120-4
Woofer / Midbass Aluminum Driver 40W 4Ω 91dB 75Hz-8500Hz Ø10.2cm
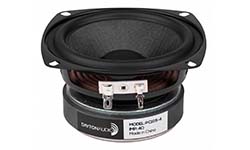
DAYTON AUDIO SIG180-4
Woofer / Midbass Aluminum Driver 80W 4Ω 91dB 40Hz-4000Hz Ø16.5cm
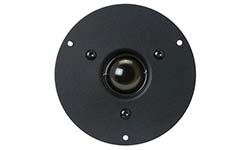
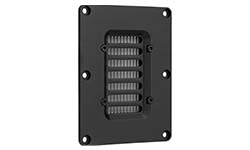
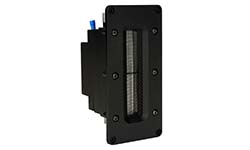
DAYTON AUDIO AMTR-4
AMT Ribbon Tweeter with Neodymium Magnet 25W 4 Ohm 94dB 1800Hz-33kHz
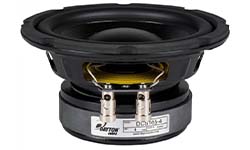
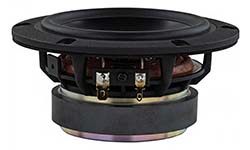
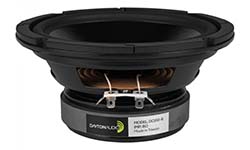
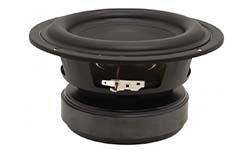
DAYTON AUDIO DSC165-4 Classic
Kevlar Subwoofer Driver 100W 4 Ohm 87dB 36Hz-1100Hz Ø16.5cm
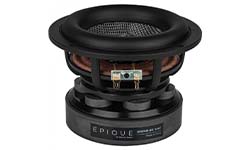
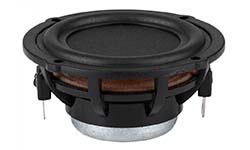
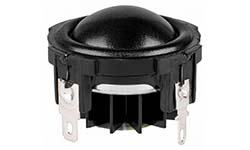
DAYTON AUDIO EPIQUE E150HE-44
DVC MMAG Carbon Fiber Subwoofer Driver 200W 8 Ohm 83dB 30Hz-4000Hz Ø14cm
Crossovers
In a loudspeaker featuring multiple drivers (2-way, 3-way, or more configurations), it is essential to use an audio crossover, also referred to as a passive crossover or simply a crossover network. Its role is to distribute the different frequency ranges of the audio signal to the most suitable drivers. For example, low frequencies will be sent to a woofer, while high frequencies will be directed to a tweeter.
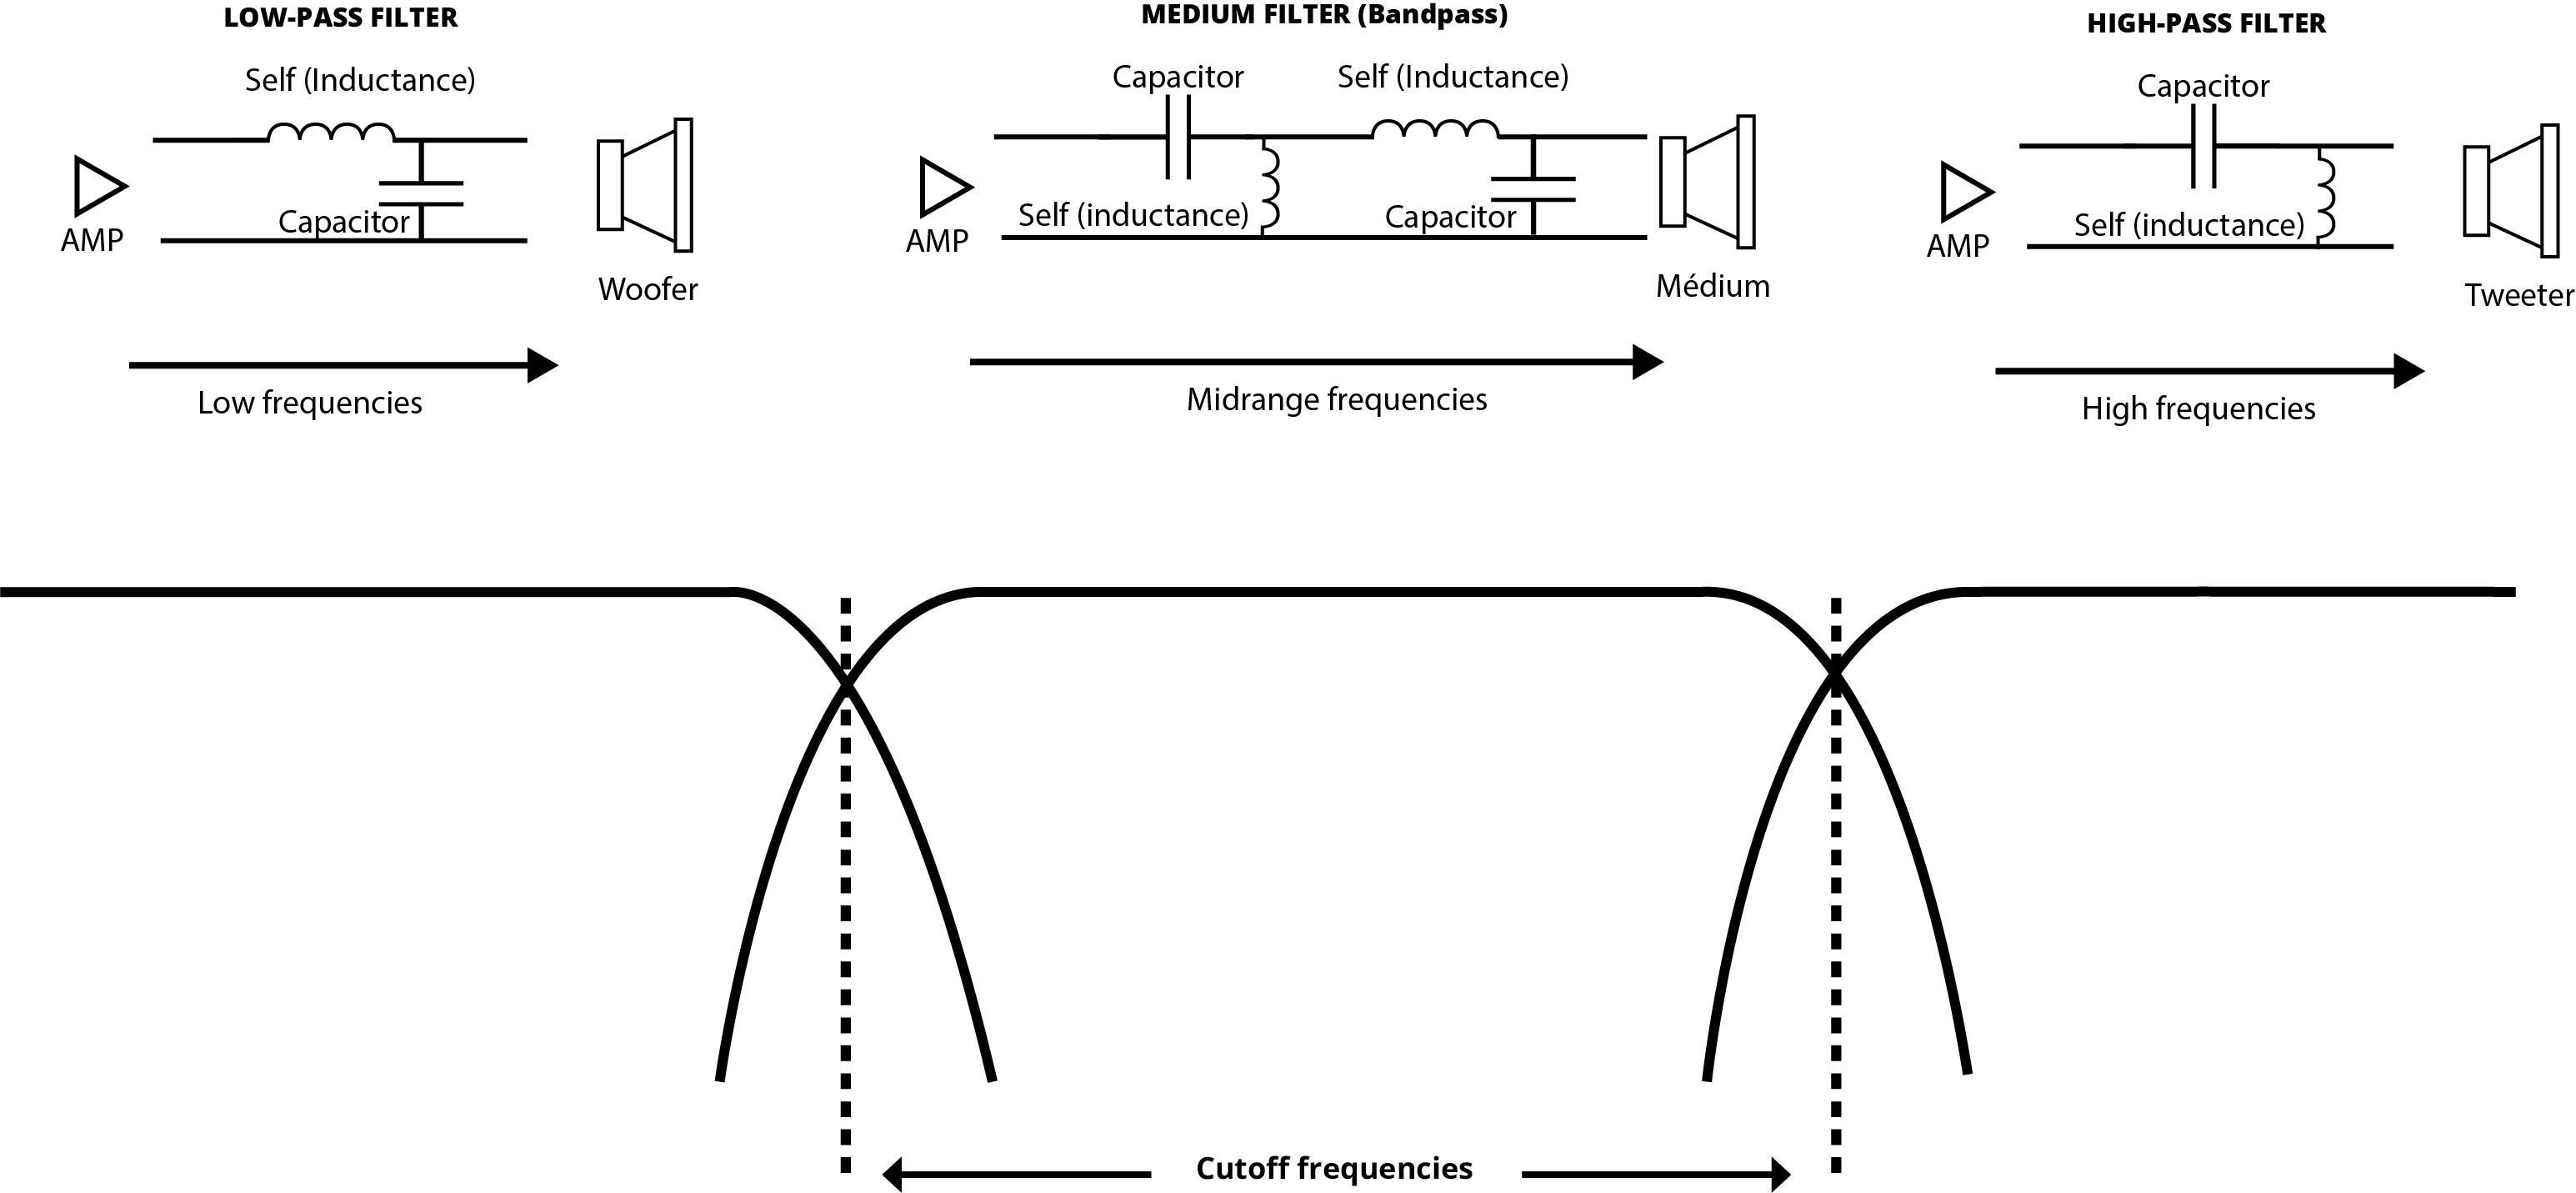
A crossover is generally made up of passive components such as capacitors, inductors (coils), and sometimes resistors. These elements make it possible to create low-pass, high-pass, or band-pass filters in order to properly distribute the audio spectrum.
- Low-pass filter: allows low frequencies to pass through (for woofers)
- High-pass filter: allows high frequencies to pass through (for tweeters)
- Band-pass filter: allows a specific frequency range to pass through (often for midrange drivers)
There are several filter orders (1st order, 2nd order, 3rd order, etc.), which determine the crossover slope expressed in dB/octave. A first-order filter, for example, has a slope of 6dB/octave, while a second-order filter has a slope of 12dB/octave.
In some DIY projects, it is also possible to use active crossovers. These operate before signal amplification and therefore require multiple amplifiers, but they provide significantly greater precision and flexibility.
EXAMPLES OF SPEAKER CONFIGURATIONS
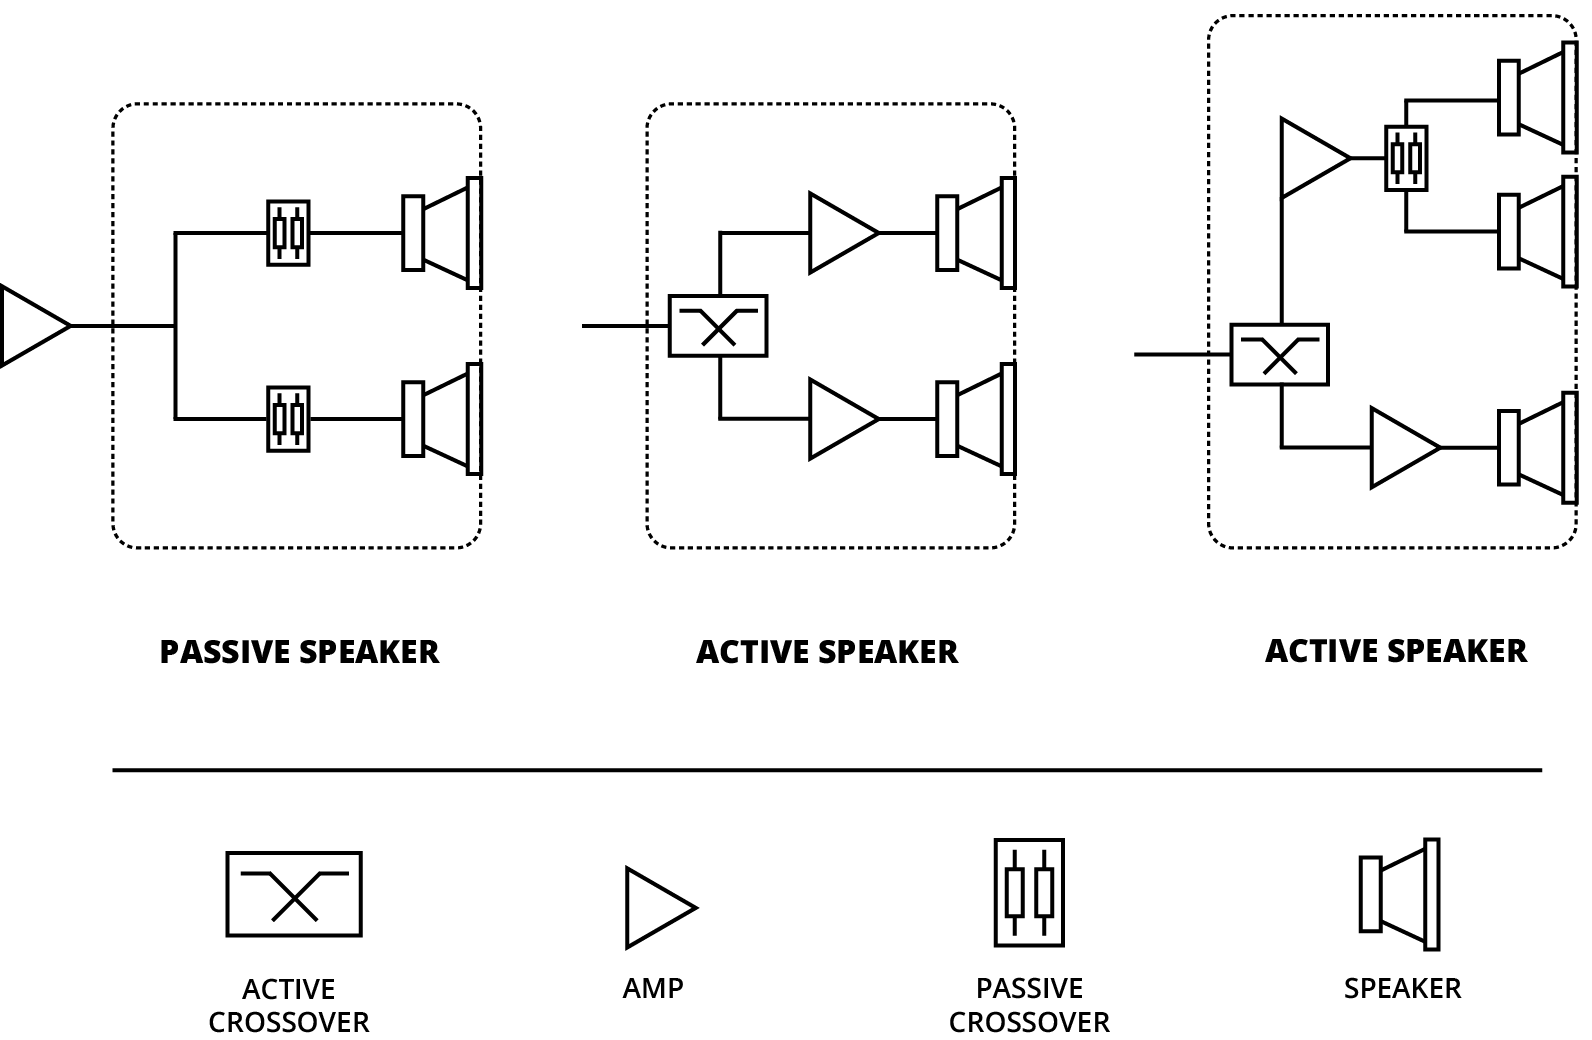
Key point: Active crossovers (analog or DSP-based) are always placed before amplification, while passive crossovers are always placed after amplification.
As a result, most active speakers featuring an analog input convert the signal before processing it: Analog Input --> ADC --> Active Crossover --> DAC --> AMP --> Driver
Focus on the main components of a passive crossover and how they work
Passive crossovers used in loudspeakers distribute the different frequency ranges of the audio signal between the appropriate drivers (woofer, midrange, tweeter). Installed between the amplifier and the drivers, they operate without an external power supply and rely solely on electronic components whose behavior varies according to signal frequency. By combining these different components, it is possible to create low-pass, high-pass, or band-pass filters that properly distribute the audio spectrum.
The capacitor
Capacitors exhibit an impedance that decreases as the signal frequency increases. In other words, they allow high frequencies to pass more easily while gradually blocking low frequencies. When placed in series with a driver, they create a high-pass filter, typically used to feed a tweeter. Placed in series with the driver, they protect it from low frequencies that could damage it. A capacitor's value is expressed in microfarads (µF) and determines the crossover frequency of the filter. When used in parallel with other components, capacitors can also form part of more complex filters or resonant circuits designed to refine the system's response.
The inductor (coil)
The inductor, or coil, operates in the opposite way to a capacitor. It allows low frequencies to pass while gradually attenuating high frequencies. It is therefore used to create low-pass filters, mainly intended for woofers or bass/midrange drivers. The value of an inductor is expressed in millihenries (mH) and also determines the crossover frequency of the filter.
The resistor
Resistors are mainly used to control the current flowing through the circuit. In a passive crossover, they are often used to adjust the output level of a driver or stabilize the behavior of the filter. They can also help damp unwanted resonances and contribute, in combination with other components, to the precise adjustment of the crossover frequency. For example, tweeters often have higher sensitivity than woofers. Resistors can therefore be used to reduce their output level and balance the overall sound reproduction. They can be used on their own or combined in an L-Pad, a small resistor network that attenuates a driver without altering the impedance seen by the crossover.
Resistors are mainly used to control the current flowing through the circuit. In a passive crossover, they are often used to adjust the output level of a driver or stabilize the behavior of the filter. They can also help damp unwanted resonances and contribute, in combination with other components, to the precise adjustment of the crossover frequency.
Component combinations
When combined, these components make it possible to create different types of filters. For example, a simple low-pass filter can be made using an inductor placed in series with a woofer to limit high frequencies. Conversely, a high-pass filter is generally created using a capacitor placed in series with a tweeter in order to block low frequencies.
By combining multiple components, it is possible to design more sophisticated filters known as higher-order filters. For example, a series inductor combined with a parallel capacitor creates a second-order filter that provides a sharper separation between frequency bands. These configurations allow for smoother transitions between drivers and a more controlled frequency response.
In most passive crossovers, operation also relies on the voltage divider principle. The different impedances of the components (resistance, capacitance, and inductance) vary according to the frequency of the audio signal. This variation changes the voltage applied to the driver, making it possible to emphasize or attenuate certain frequencies.
In summary, the arrangement of resistors, capacitors, and inductors determines how the different frequencies are distributed within the loudspeaker. Their interaction shapes the system's frequency response and adapts the audio signal to each driver in order to achieve balanced sound reproduction.
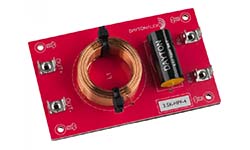
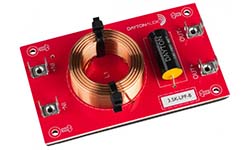
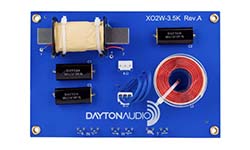
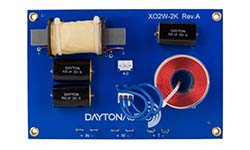
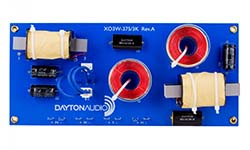
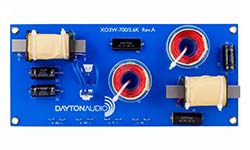
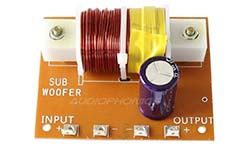
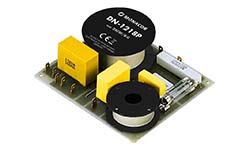
EXAMPLES OF PASSIVE CROSSOVERS
Focus on our Passive Crossovers
Additional concepts worth knowing:
Impedance Correction Network (Zobel)
Some passive crossovers also use a circuit known as a Zobel network. This typically consists of a resistor and capacitor connected in parallel across a driver, most often a woofer. This circuit stabilizes the driver's impedance at higher frequencies, improving crossover performance and resulting in a smoother frequency response.
Protection Devices
In some passive crossovers, particularly those used with tweeters, protection devices can be found to prevent damage in case of overload. These may include a fuse, a PTC resistor (thermistor), or sometimes a protection lamp. These components automatically limit current when the sound level becomes too high, protecting the most delicate drivers.
By combining these different components — capacitors, inductors, resistors, and correction circuits — designers can create passive crossovers of varying complexity in order to optimize frequency distribution, acoustic phase alignment, and the tonal balance of the loudspeaker.
Filter Orders and Crossover Slopes
In loudspeaker design, passive crossovers are often classified according to their order. The order of a filter corresponds to the number of reactive components (capacitors or inductors) used in the circuit. The higher the order, the sharper the separation between the different frequency bands.
A first-order filter uses a single reactive component: either a capacitor or an inductor. This type of filter provides a relatively gentle crossover slope of 6 dB per octave. It is simple to design and introduces minimal phase shift, but the separation between drivers remains limited.
A second-order filter generally uses two reactive components (for example, an inductor and a capacitor). The crossover slope becomes steeper, at approximately 12 dB per octave. This type of filter provides better frequency separation and is widely used in two-way loudspeakers.
Third-order filters and higher use additional components and provide even steeper slopes (18 dB/octave, 24 dB/octave, etc.). They allow for highly precise separation of frequency bands but make the design process more complex, particularly due to phase effects and interactions between drivers.
The choice of filter order therefore depends on the desired compromise between circuit simplicity, crossover precision, and the overall acoustic performance of the loudspeaker.
Speaker Enclosures
The enclosure, also called the speaker cabinet or speaker chassis, is an essential element in the design of a DIY speaker. It is not simply a box containing speakers: its design directly influences sound quality, low-frequency response, and the overall neutrality of the speaker.
The material used plays an important role. Commonly used materials include:
- MDF (Medium Density Fiberboard): the most commonly used material for DIY speakers
- Plywood: lighter and very durable
- Solid wood: aesthetically pleasing but more difficult to control acoustically
- PVC or plastic: often used for compact or portable speakers
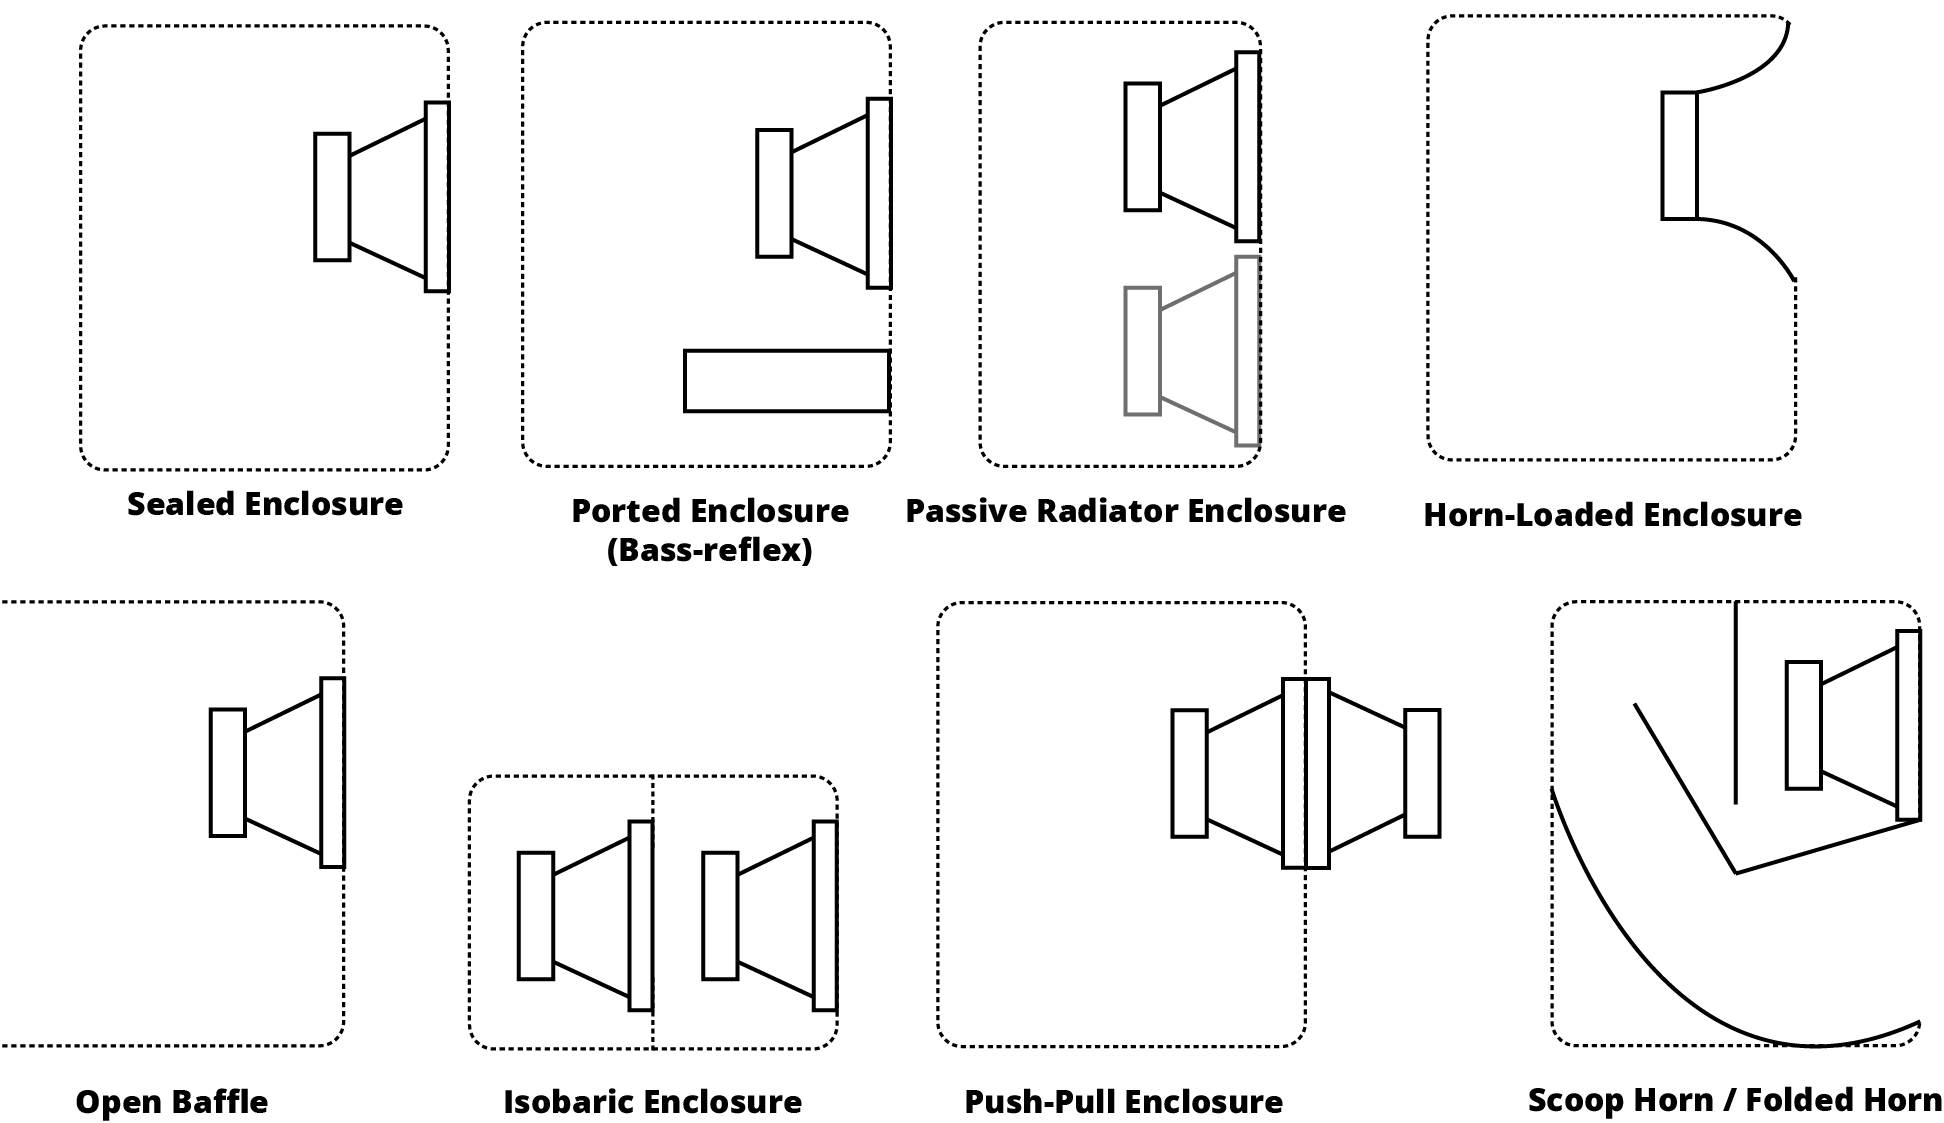
There are several types of acoustic loading for a cabinet:
- Sealed enclosure: simple design with clean and controlled bass
- Bass-reflex: uses a port to improve low-frequency efficiency
- Passive radiator: an alternative to bass-reflex in small enclosures
- Horn-loaded enclosure: improves acoustic efficiency
- Open baffle: open design without a closed cabinet
- And others: isobaric, push-pull, scoop/horn-loaded, planar, etc.
It is also important to provide good internal damping in order to limit cabinet resonances. Acoustic foam, synthetic fiber, or felt are often used to absorb standing waves inside the enclosure.
Finally, cabinet rigidity is essential: an overly flexible enclosure can vibrate and color the sound. To avoid this, internal reinforcements called "bracing" can be added.
EXAMPLES OF ACOUSTIC LOADING TYPES
Calculating Speaker Volume
The internal cabinet volume is an essential parameter for achieving good acoustic performance. Each speaker driver has an optimal enclosure volume that depends directly on its Thiele-Small parameters. This information is generally provided in the manufacturer's datasheet and makes it possible to determine the type of enclosure (sealed, bass-reflex, etc.) as well as the recommended internal volume for optimal performance. This volume corresponds to the air space available inside the speaker once the volume occupied by the drivers, internal bracing, ports, and electronic modules has been deducted.
A volume that is too small will limit low-frequency reproduction and may result in a drier or less deep sound. Conversely, a volume that is too large can lead to less accurate bass and reduced driver control. Proper cabinet sizing therefore provides the best balance between bass extension, accuracy, and acoustic efficiency.
To determine the ideal volume and simulate the acoustic behavior of a driver in an enclosure, several simulation software packages are widely used in the DIY audio field. Among the most popular tools are WinISD, particularly appreciated for its ease of use, VituixCAD, which also allows crossover and multi-way system simulations, and BassBox, which offers advanced calculation and modeling features. These programs make it possible to visualize frequency response, bass-reflex tuning, and driver excursion according to cabinet volume.
Driver Placement on the Front Baffle
The placement of drivers on the front baffle of a speaker is often underestimated but is extremely important for achieving good sound reproduction. The relative position of the drivers directly affects sound field coherence, phase alignment between the different drivers, and stereo imaging quality. In a two-way speaker, for example, it is recommended to position the tweeter relatively close to the woofer in order to minimize phase offsets and ensure a smoother transition around the crossover frequency.
The tweeter is generally positioned at ear level when the listener is seated, since high frequencies are highly directional. This provides more accurate reproduction and better detail perception. In bookshelf or compact speakers, the tweeter is therefore often placed above the woofer on the front baffle.
It can also be beneficial to avoid perfect symmetry on the front baffle. Indeed, certain overly symmetrical layouts can accentuate acoustic diffraction effects along the cabinet edges. To reduce these effects, some designers slightly offset the drivers or use an asymmetrical layout. Another solution is to round the edges of the baffle or use chamfers. This helps reduce sound wave reflections from the cabinet edges and improves frequency response linearity.
Acoustic Measurements
For designers wishing to go further in optimizing their DIY speaker, it is possible to perform acoustic measurements. These measurements allow objective analysis of the speaker's performance and help fine-tune parameters such as crossover design, cabinet volume, and bass-reflex tuning. The most commonly used tool in this field is a measurement microphone, specifically designed to capture sound accurately and neutrally.
This microphone is generally used with acoustic measurement software such as REW (Room EQ Wizard), a very popular tool within the DIY audio community. This type of software makes it possible to measure the frequency response of a speaker, meaning how it reproduces the different audible frequencies. The results are displayed as curves that help identify dips, peaks, or resonances in sound reproduction.
Although this step is not essential for a first DIY project, it significantly improves tuning accuracy and provides a more scientific approach to speaker design. For enthusiasts looking to perfect their projects, acoustic measurements are therefore an extremely valuable tool.
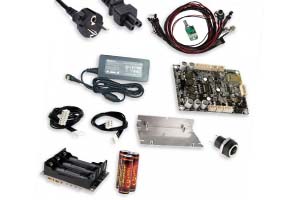
Electronic Modules
In the case of an active or Bluetooth speaker, several electronic modules are added to the system to make the speaker autonomous and fully functional.
The first essential element is, of course, the amplifier module. It amplifies the audio signal in order to properly drive the speakers. Today, many compact amplifiers based on Class D chips offer excellent efficiency and low power consumption, making them ideal for portable speakers.
A Bluetooth module is also very commonly used, allowing wireless audio reception from a smartphone, tablet, or computer. Some modules directly combine Bluetooth reception and amplification on a single electronic board, greatly simplifying assembly.
Other modules can also be added depending on the project's requirements:
- DAC modules (digital-to-analog converters)
- Battery management modules (BMS)
- USB or USB-C chargers
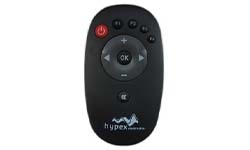
- Control modules (buttons, rotary encoders, remote controls)
- Battery level LED indicators
For a portable speaker powered by a lithium battery, it is highly recommended to use a BMS (Battery Management System). This circuit protects the battery against overcharging, deep discharge, and short circuits.
The electronic integration should be considered from the very beginning of the project in order to provide enough space inside the cabinet and facilitate cable routing as well as access to the various connectors.
Discover Our DIY Modules
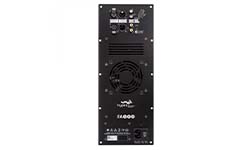
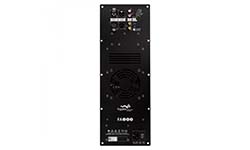
Focus on HYPEX FUSIONAMP Modules for Active Speakers
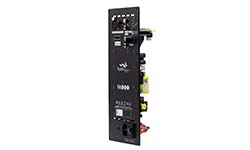
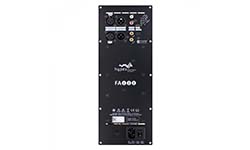
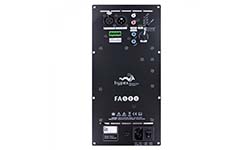
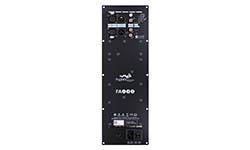
HYPEX FUSIONAMP FA123
NCore 2x125W + 100W Amplifier Module DSP ADAU1450 DCC AK4454 192kHz
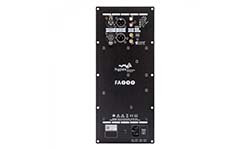
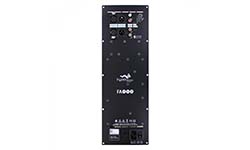
Hypex FusionAMP FA253
NCore 2x250W + 100W Amplifier Module DSP ADAU1452 DCC AK4454 192kHz
Assembly and Finishing
Once all the components have been selected and the cabinet has been built, the final stage begins: speaker assembly. This phase requires precision and a minimum amount of tooling in order to achieve a solid and aesthetically pleasing result.
The first step generally consists of assembling the cabinet using wood glue and clamps. In some cases, screws can also be used to reinforce the assembly. It is important to ensure that the panels are perfectly aligned and securely held in place during drying in order to obtain a rigid and durable structure.
Cabinet Sealing
A properly sealed enclosure is crucial when designing a high-performance loudspeaker system. A poorly sealed cabinet can cause air leaks that negatively affect low-frequency response and degrade the overall performance of the driver. This is particularly important for sealed and bass-reflex enclosures. To ensure perfect airtightness, it is recommended to apply wood glue to all panel joints during assembly. Once the cabinet is assembled, a silicone sealant or acoustic caulk can also be applied to the internal corners to eliminate any air leaks. The drivers themselves should also be properly isolated from the front baffle using a foam gasket or sealing strip to prevent any loss of acoustic pressure.
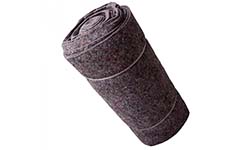
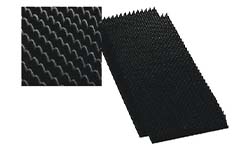
Internal Damping
Its role is to reduce internal cabinet resonances and absorb standing waves generated by the rear radiation of the driver. Without internal acoustic treatment, these waves can reflect off the cabinet walls and negatively affect sound reproduction, particularly in the midrange frequencies. To prevent this, various absorbent materials are commonly used, such as acoustic foam, polyester fiberfill (polyfill), felt, or mineral wool. These materials help diffuse and absorb part of the acoustic energy inside the enclosure. The amount and placement of damping material depend on the type of acoustic loading used. For example, a sealed enclosure can be filled more extensively to improve response linearity, while a bass-reflex enclosure generally requires more moderate damping so as not to interfere with the operation of the port. It is generally recommended to line the internal walls of the cabinet while leaving sufficient space around the driver and port to ensure proper airflow.
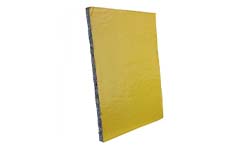
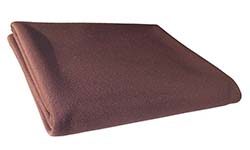
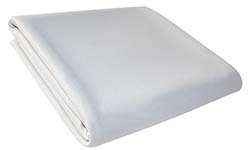
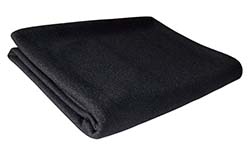
Here Are Some Acoustic Foams and Fabrics Available in Our Catalog

Internal Wiring
Once the mechanical assembly is complete, the various electronic modules can be installed and the internal wiring can be carried out. This wiring provides the connection between the amplifier module, any crossover networks, connectors, and the speakers. Although it is a relatively simple part of the build, it should be done carefully to avoid reliability issues or unwanted noise. Flexible wires with a cross-sectional area between 0.75mm² and 1.5mm² are generally used, which is more than sufficient for most compact DIY speaker projects. It is important to respect the speaker polarity (positive and negative terminals) in order to avoid out-of-phase operation, which would significantly degrade the stereo image. Connections can be made either by direct soldering or by using Faston terminals to facilitate future disassembly. It is also recommended to organize the wiring neatly inside the cabinet to prevent wires from vibrating against the walls or components when the speaker is operating at high volume levels.
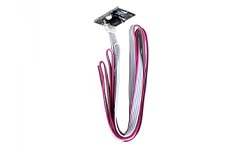
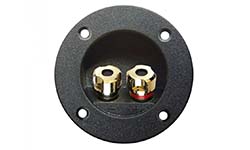
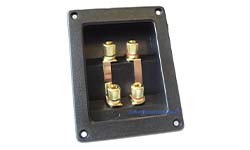
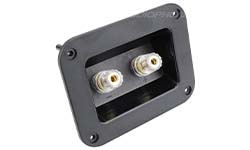
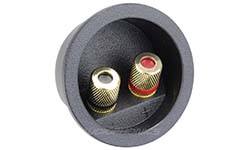
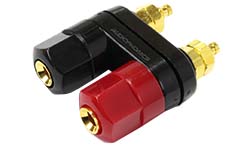
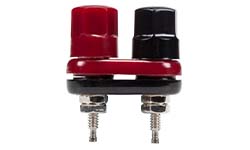
Speaker Terminals
Speaker terminals form the interface between your audio system (amplifier) and your DIY speaker. They are generally integrated into a terminal plate mounted on the rear of the cabinet, making both wiring and component integration easier. Several types of terminals are available, the most common being binding posts, which are compatible with bare wire, banana plugs, or spade connectors.
In a DIY project, terminal plates may also include additional features such as a jack connector, RCA connectors, a power module, or even a fuse holder. They help centralize all connections and ensure a clean and secure installation. Choosing high-quality terminals is important to guarantee good electrical contact and minimize signal losses.
Finally, special attention should be paid to the airtight sealing of the terminal plate during installation. As with the drivers, the addition of a foam gasket or silicone sealant is recommended to prevent air leaks, which is essential for maintaining the acoustic performance of the speaker, especially in a bass-reflex design.
Discover a selection of speaker terminals available in our catalog
Finally, it's time for the finishing touches. Several options are available depending on the desired aesthetic result:
- Paint
- Varnish
- Wood veneer
- Vinyl wrap
- Acoustic grille fabric
This final stage is often what gives your DIY speaker its unique character. With a bit of care and creativity, it is possible to achieve a result that is both attractive, durable, and perfectly suited to your needs.

Discover Our DIY Speaker Kits
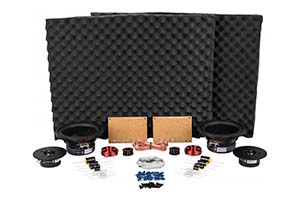
BATTERY-POWERED ACTIVE BLUETOOTH SPEAKER KIT
Battery-Powered Amplified Speaker 2x30W / DAC / Bluetooth
View Product Page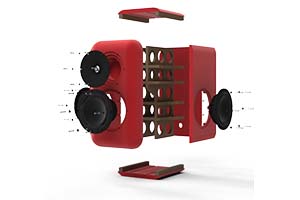
DIY Inspirations
© Demetrio Garcia, Pinterest
© FantasticSpeech612, Reddit
© HiFi Retro
© Natalie Luong, Pinterest
© Outfox
© Instructables
© Automatic Audio
© Terry Hsu, Pinterest
© Big WR, YouTube
© Main Audio
© Garnier Benoit, Pinterest
© AV Watch
© Demetrio Garcia, Pinterest
© FantasticSpeech612, Reddit
© HiFi Retro
© Natalie Luong, Pinterest
© Outfox
© Instructables
© Automatic Audio
© Terry Hsu, Pinterest
© Big WR, YouTube
© Main Audio
© Garnier Benoit, Pinterest
© AV Watch
Useful Links


Rechercher dans le blog
Blog categories
Latest Comments

Audiophonics Team
on DIY Tutorial - PiCorePlayer - Installing...
Pierre Bommel
on Lecteur réseau Opensource : Solutions
Pierre Bommel
on DIY Tutorial - PiCorePlayer - Installing...
Audiophonics Team
on Tutorial DIY - Power cable ELECAUDIO CS-331B


![[GRADE B] DAYTON AUDIO MKSX4 Low Profil Subwoofer Speaker 160W Ø20cm](https://www.audiophonics.fr/72897-thumb_default/dayton-audio-mksx4-low-profil-subwoofer-speaker-160w-o20cm.jpg)